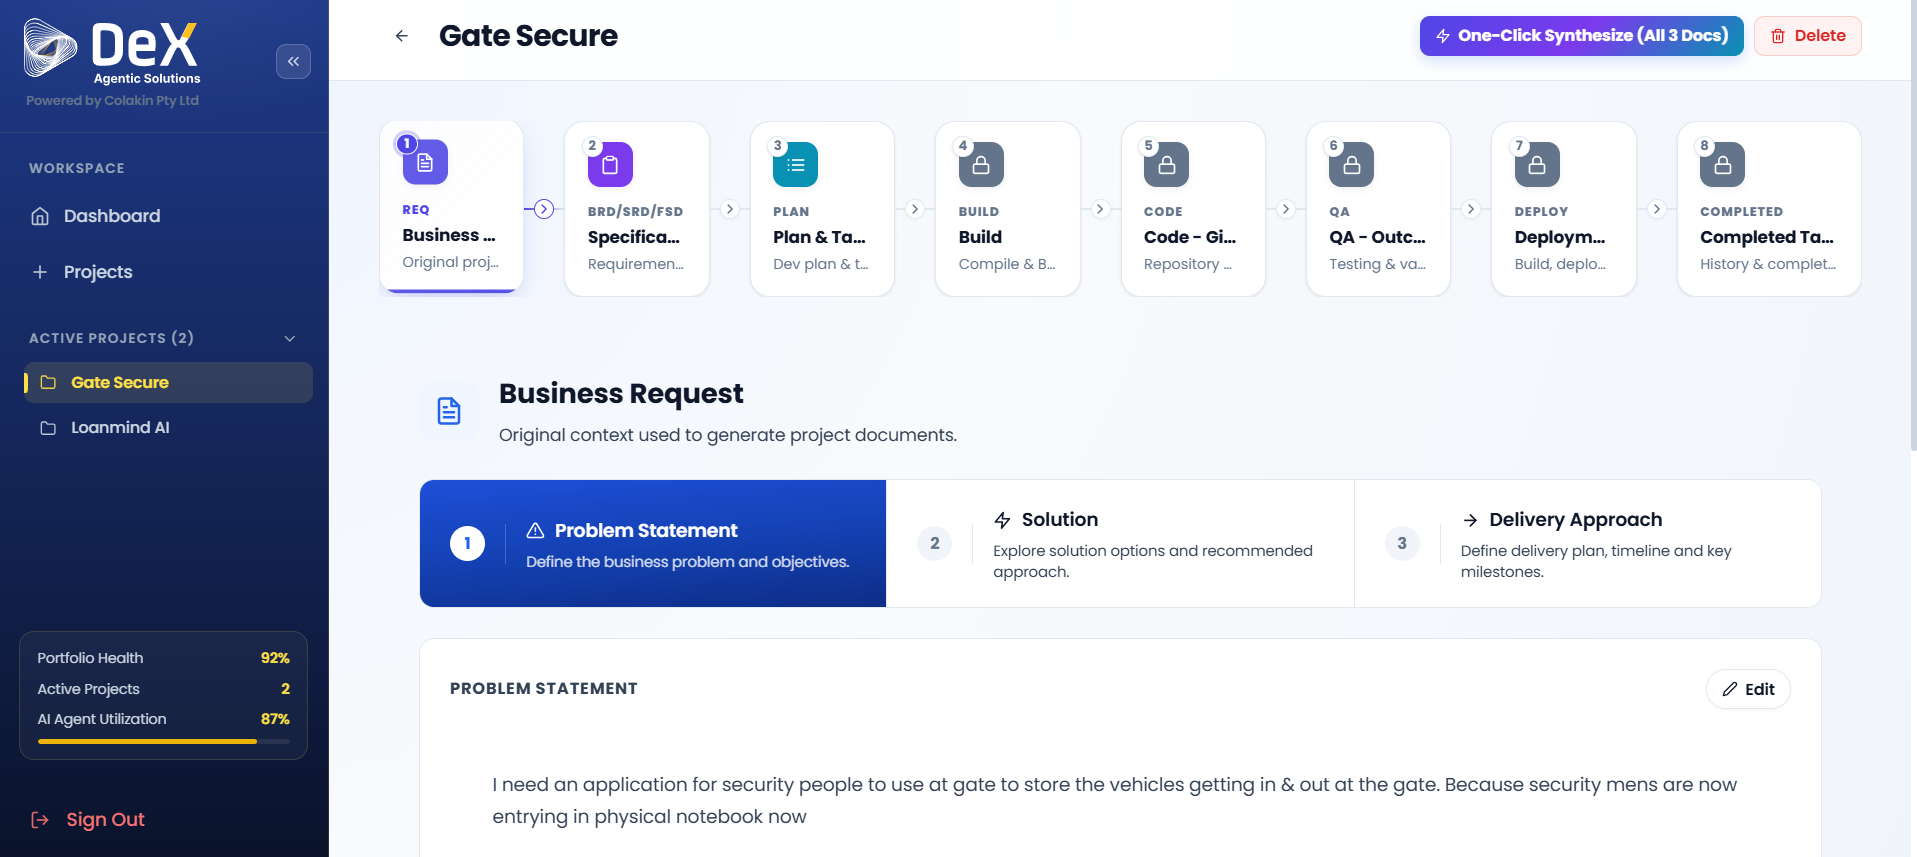
Projects
The Projects section in DeX is where ideas become structured, AI-generated delivery packages. Each project you create passes through a guided five-step brief that feeds the AI engine — producing requirement documents, architecture specs, sprint plans, and tasks automatically.
💡 A well-filled project brief is the foundation for high-quality AI-generated documentation. Invest time here to get the best outputs downstream.
5.1 How to Create a Project
You can start a new project from two places:
- Click "Create Project" from the Dashboard top bar, or
- Click "+ Projects" from the left menu panel
Both routes take you to the Create New Project workspace — a guided five-step flow that transforms your idea into structured requirements and delivery plans using AI.
The five steps are:
| Step | Name | Purpose |
|---|---|---|
| 1 | Overview | Name and categorize the project |
| 2 | Problem | Define the business pain points |
| 3 | Solution | Describe what you're building |
| 4 | Implementation | Specify your technical stack |
| 5 | Review | Confirm all inputs before AI generation |
📊 The right-side panel shows real-time progress indicators — completion percentage, brief quality score, and a preview of outputs that will be generated (BRD, SRD, etc.).
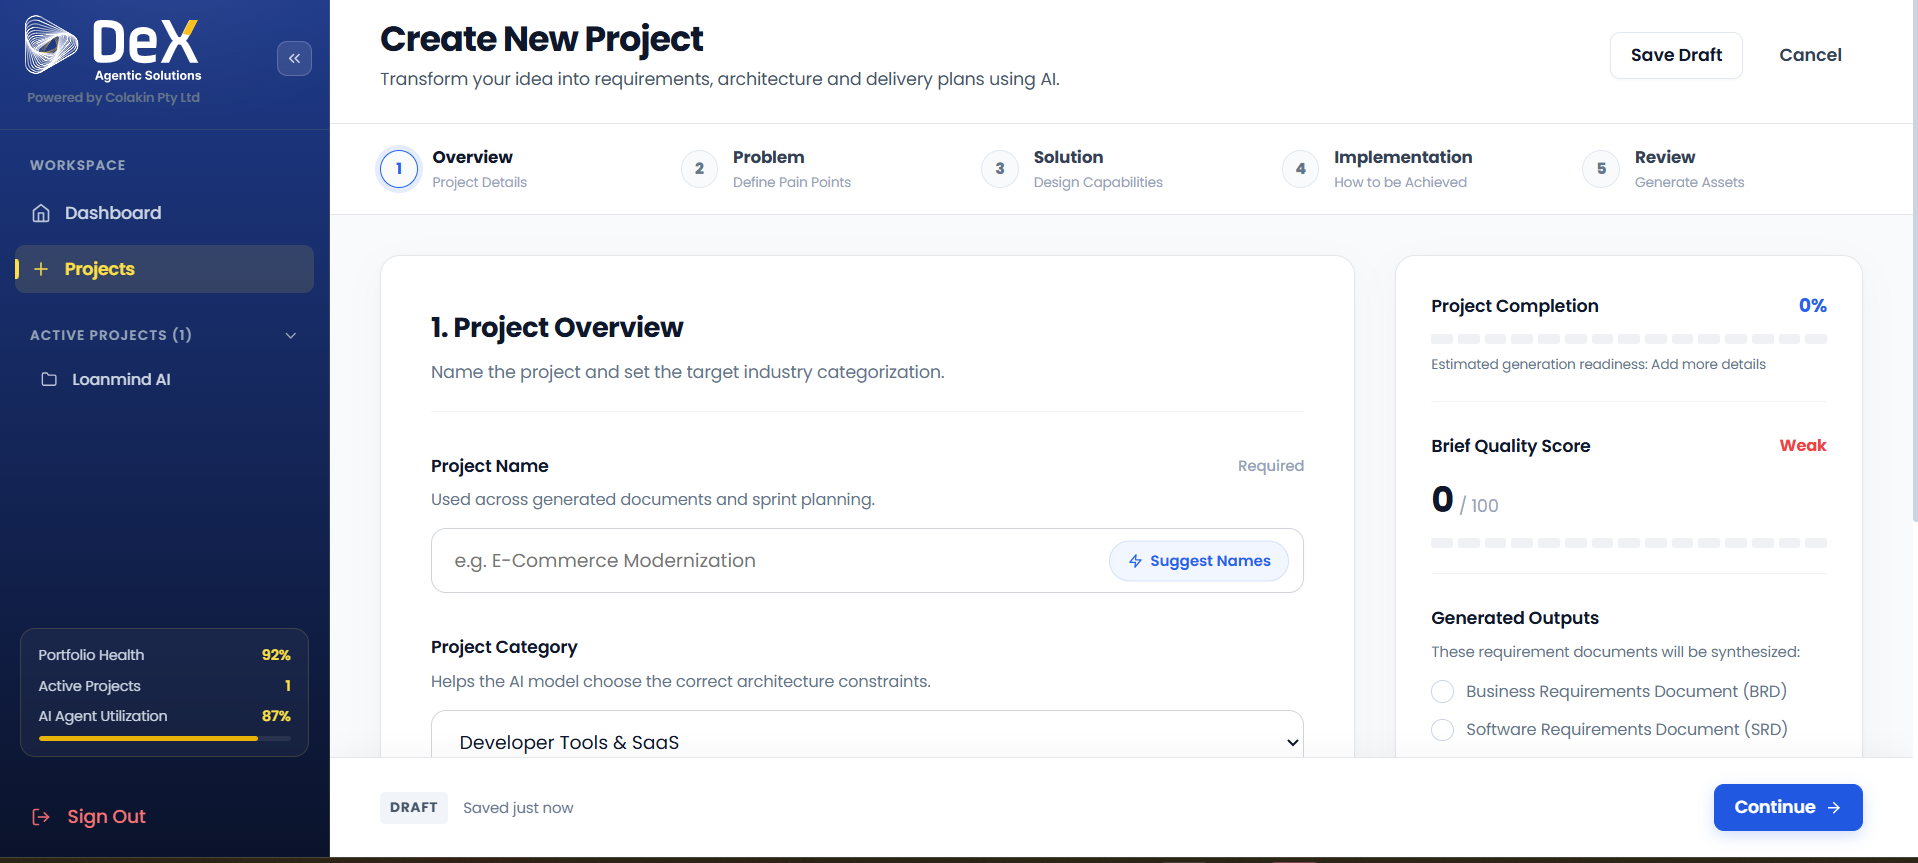
5.2 Step 1 — Project Overview
The Overview step establishes the foundational identity of your project.
Steps:
- Enter the Project Name — this name will be used across all generated documents and sprint plans.
- Optionally click "Suggest Names" to get AI-generated naming options based on your category.
- Select a Project Category (e.g.,
Developer Tools & SaaS) — this guides the AI in applying appropriate architecture constraints. - Click Continue to proceed to Step 2 — Problem Definition.
- Click Save Draft at any time to store your progress and return later.
🏷️ Choose your project category carefully — it influences how the AI frames architecture recommendations and technology suggestions in later phases.
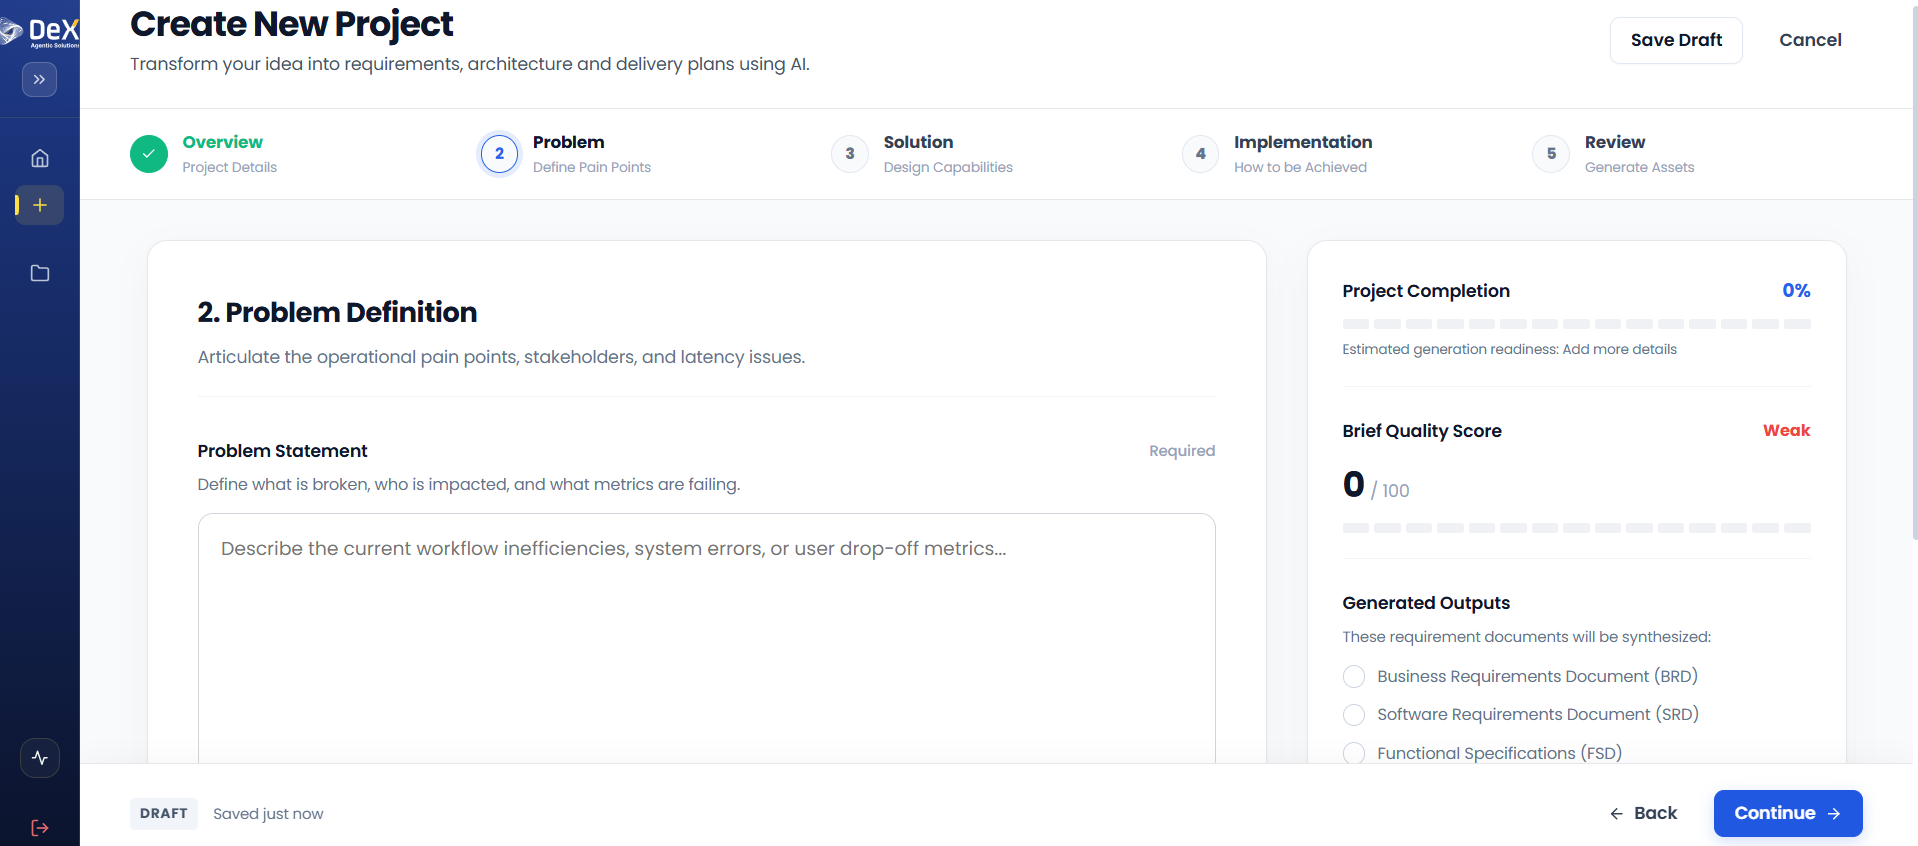
5.3 Step 2 — Problem Definition
The Problem Definition step captures the real-world pain points your project addresses. The more specific and data-driven your inputs, the more precise your AI-generated documents will be.
This stage captures:
- Operational pain points
- Impacted stakeholders
- Failing metrics or KPIs
Steps:
- In the input field, describe:
- What is broken — the current failure or gap
- Who is impacted — teams, customers, or systems affected
- Which metrics are failing — quantifiable indicators of the problem
- Craft a clear problem statement that captures all three dimensions.
Example problem statement:
"Traditional MSME and CMA loan processing is slowed by manual paperwork, fragmented systems, and compliance delays. These inefficiencies create friction for businesses seeking credit, increase turnaround times for lenders, and reduce transparency in monitoring loan performance."
- Click Back to return to Project Overview.
- Click Continue to proceed to Step 3 — Solution Design.
- Click Save Draft to store progress and resume later.
✏️ Avoid vague statements like "the system is slow." Instead, include specific pain points, affected user roles, and measurable impacts for the highest-quality document output.
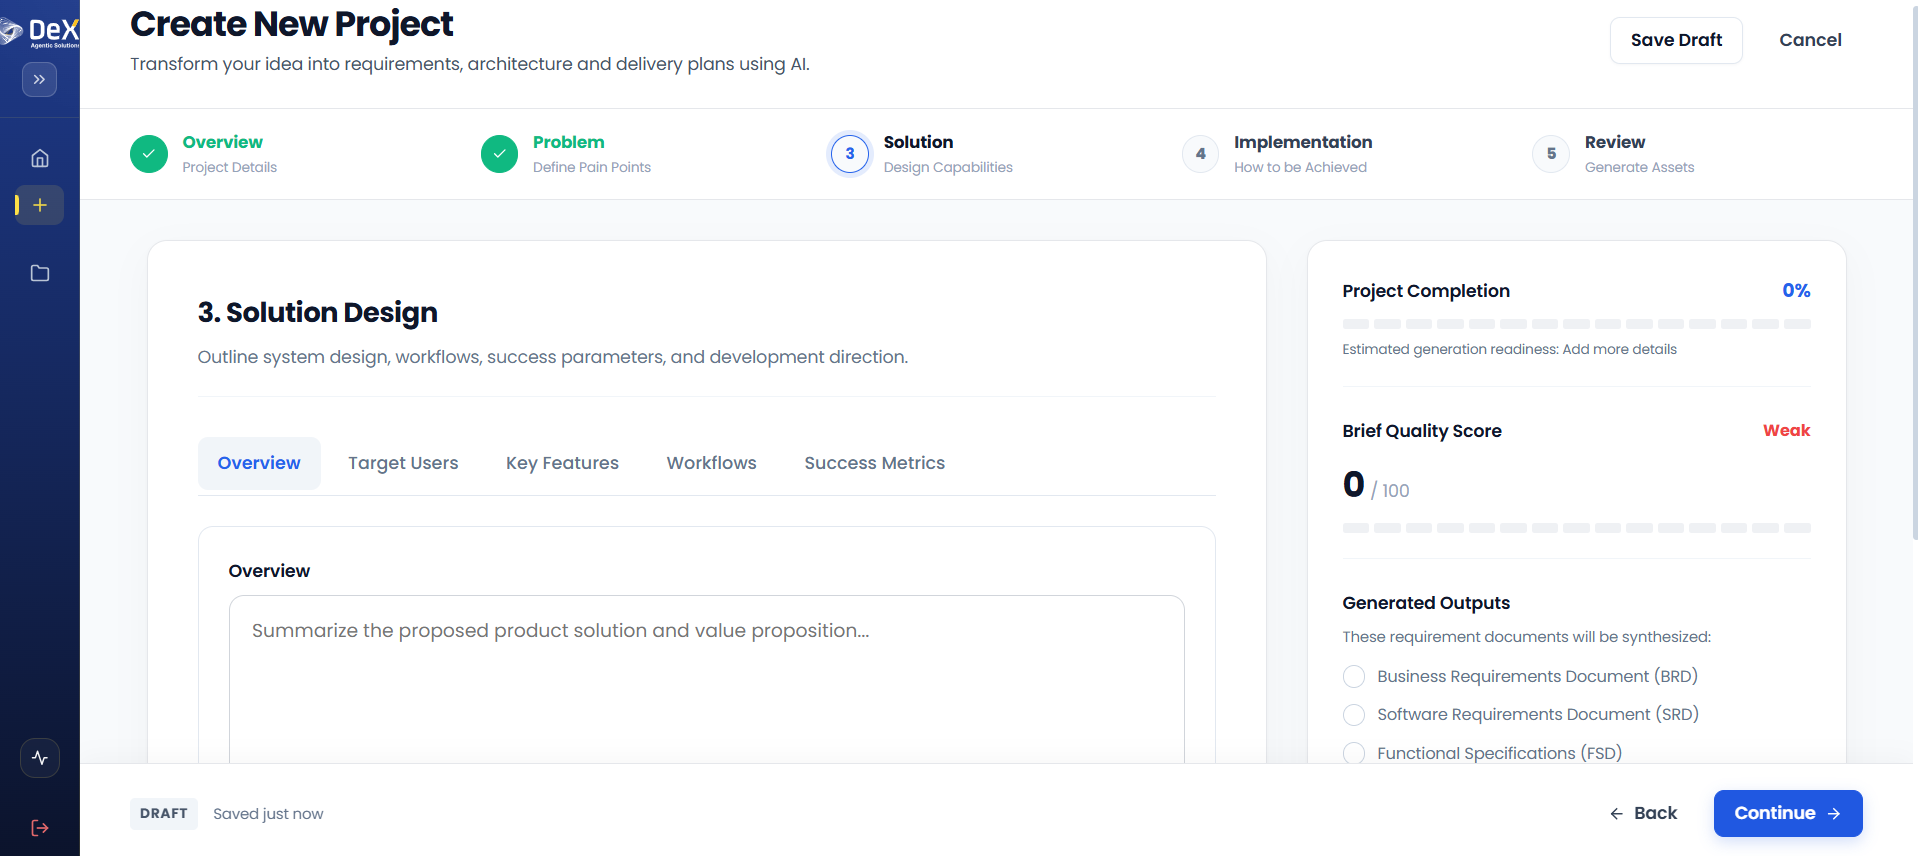
5.4 Step 3 — Solution Design
Solution Design is where you describe what you're building, who it's for, and how success will be measured. This step shapes the core content of your BRD, SRD, and FSD.
This stage captures inputs across four tabs:
Overview Tab
Summarize the proposed solution and its core value proposition.
Example:
"LoanMind AI automates CMA report generation and loan processing, reducing manual effort and ensuring compliance transparency."
Target Users Tab
Define your primary and secondary user groups.
Example:
"Primary users: loan officers and compliance managers. Secondary users: SMEs applying for credit and auditors reviewing reports."
Key Features Tab
List the essential product capabilities that differentiate this solution.
Example:
"Voice-based CMA generation, automated BRD/SRD/FSD synthesis, real-time QA validation, and continuous deployment with live app preview."
Workflows Tab
Outline the key process flows or system interactions.
Example:
"User submits loan application via voice → AI generates CMA report → Compliance manager reviews → System pushes to lender dashboard."
Success Metrics Tab
Define measurable outcomes that indicate success.
Example:
"Reduced loan processing time by 40%, improved SME adoption rates, and compliance adherence with zero audit exceptions."
Navigation:
- Click Back to return to Problem Definition.
- Click Continue to proceed to Step 4 — Technical Architecture.
- Click Save Draft to store progress.
- Click Cancel to exit project creation.
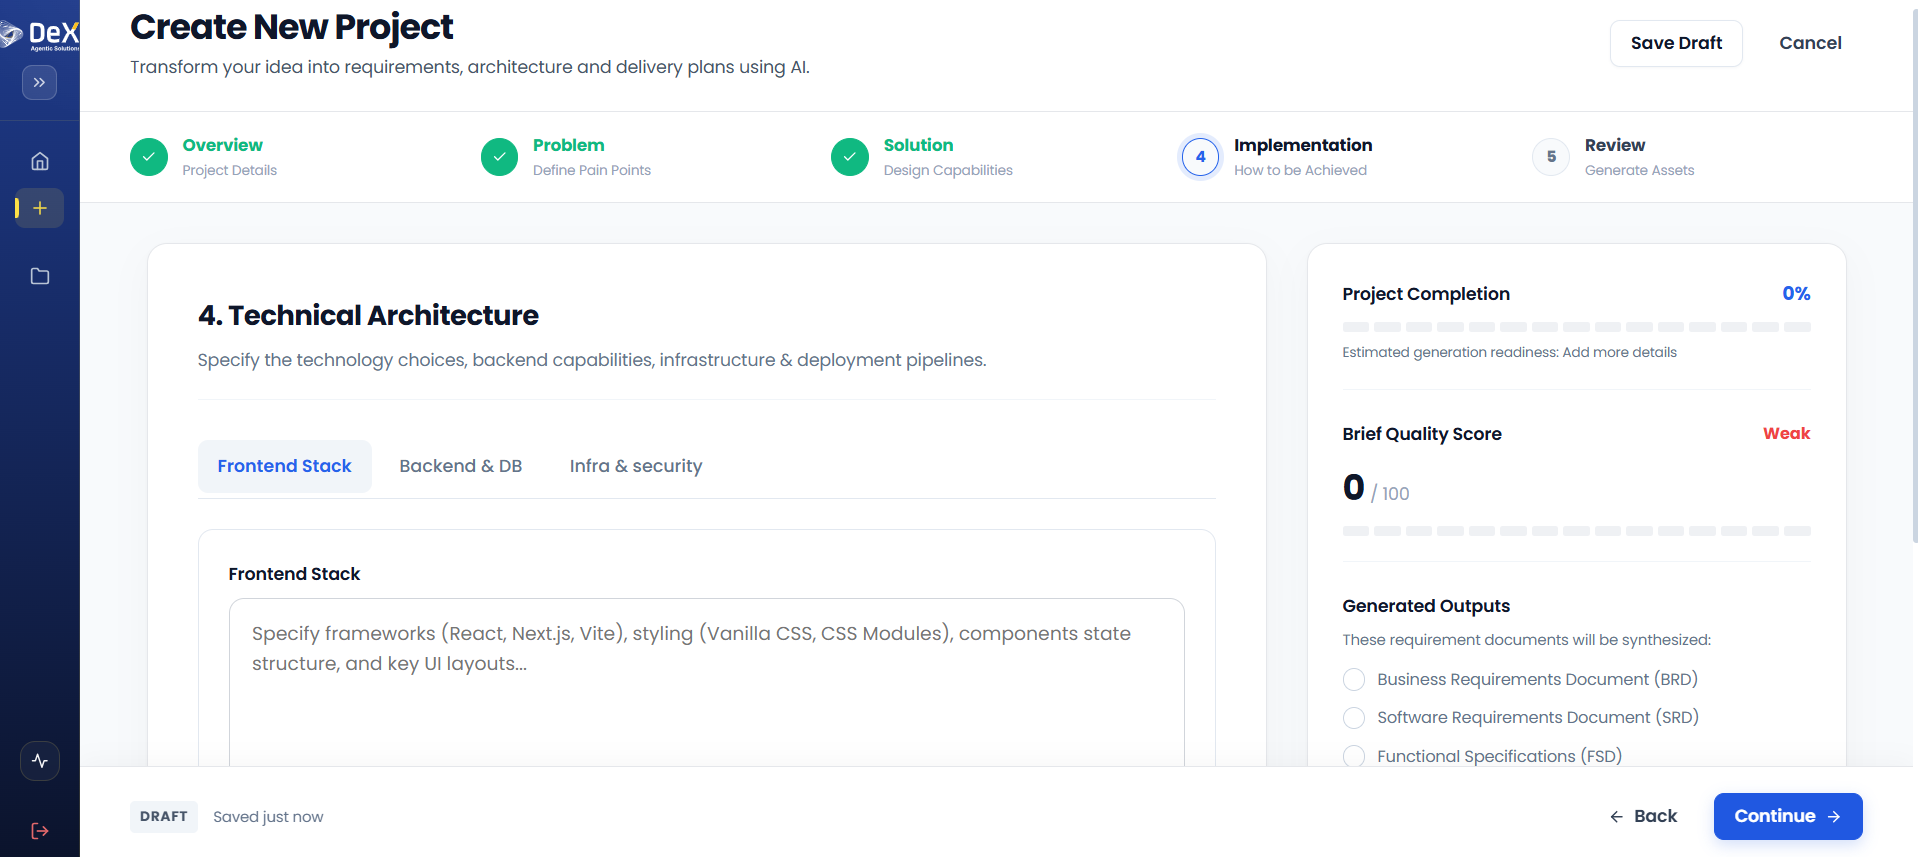
5.5 Step 4 — Technical Architecture (Implementation)
The Implementation step defines the technology choices that will shape how your solution is built. These inputs directly influence the architecture and infrastructure sections of your generated documents.
This step is organized across three tabs:
Frontend Stack Tab
Specify the technologies used to build the user-facing application.
| Field | Example |
|---|---|
| Frameworks | React, Next.js, Vite |
| Styling approach | CSS Modules, Vanilla CSS |
| Component/state structure | Redux, Context API, Zustand |
| UI layouts | Dashboard, form-based, data-grid views |
Backend & DB Tab
Define the server-side language, framework, and data layer.
| Field | Example |
|---|---|
| Backend language/framework | Node.js, Java, .NET |
| Database type | SQL (PostgreSQL), NoSQL (MongoDB) |
| Schema considerations | Multi-tenant, normalized, document-based |
Infra & Security Tab
Specify where and how the application will run, and how it will be protected.
| Field | Example |
|---|---|
| Cloud provider | AWS, Azure, GCP |
| Containerization | Docker, Kubernetes |
| CI/CD pipelines | GitHub Actions, Jenkins |
| Authentication | OAuth2, JWT, SSO |
| Encryption | TLS, AES-256 at rest |
| Compliance standards | SOC 2, GDPR, ISO 27001 |
Navigation:
- Click Back to return to Solution Design.
- Click Continue to proceed to Step 5 — Review & Asset Generation.
- Click Save Draft to store progress and resume later.
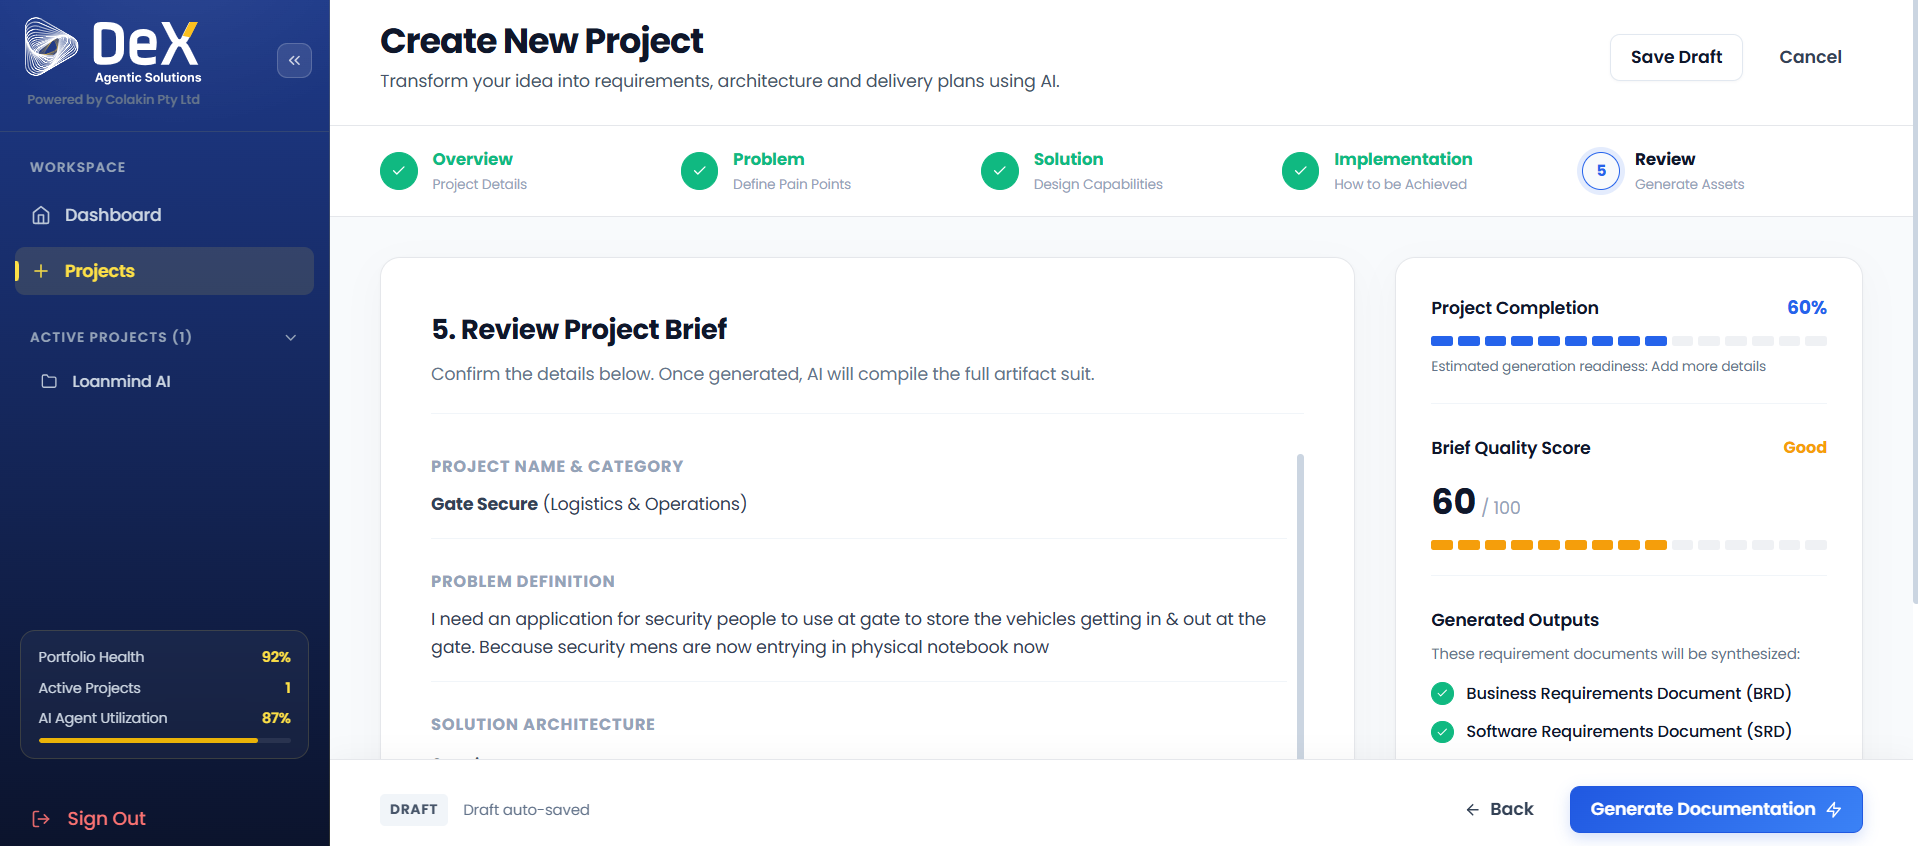
5.6 Step 5 — Review Project Brief
The Review step is your final checkpoint before the AI engine begins generating your full documentation suite. Take time here to verify all inputs are accurate and complete.
Checklist before generating:
- Project Name and Category are correct
- Problem Definition clearly identifies pain points, stakeholders, and metrics
- Solution Design covers overview, users, features, workflows, and success metrics
- Technical Architecture specifies frontend, backend, and infrastructure details
Steps:
- Review Project Name & Category at the top of the summary.
- Read through the Problem Definition for completeness and accuracy.
- Verify all required fields are filled in across all sections.
- Click Back to revise any earlier step if needed.
- Click Generate Documentation to launch the AI Document Compilation Engine.
- Click Save Draft to store progress without generating.
- Click Cancel to exit project creation.
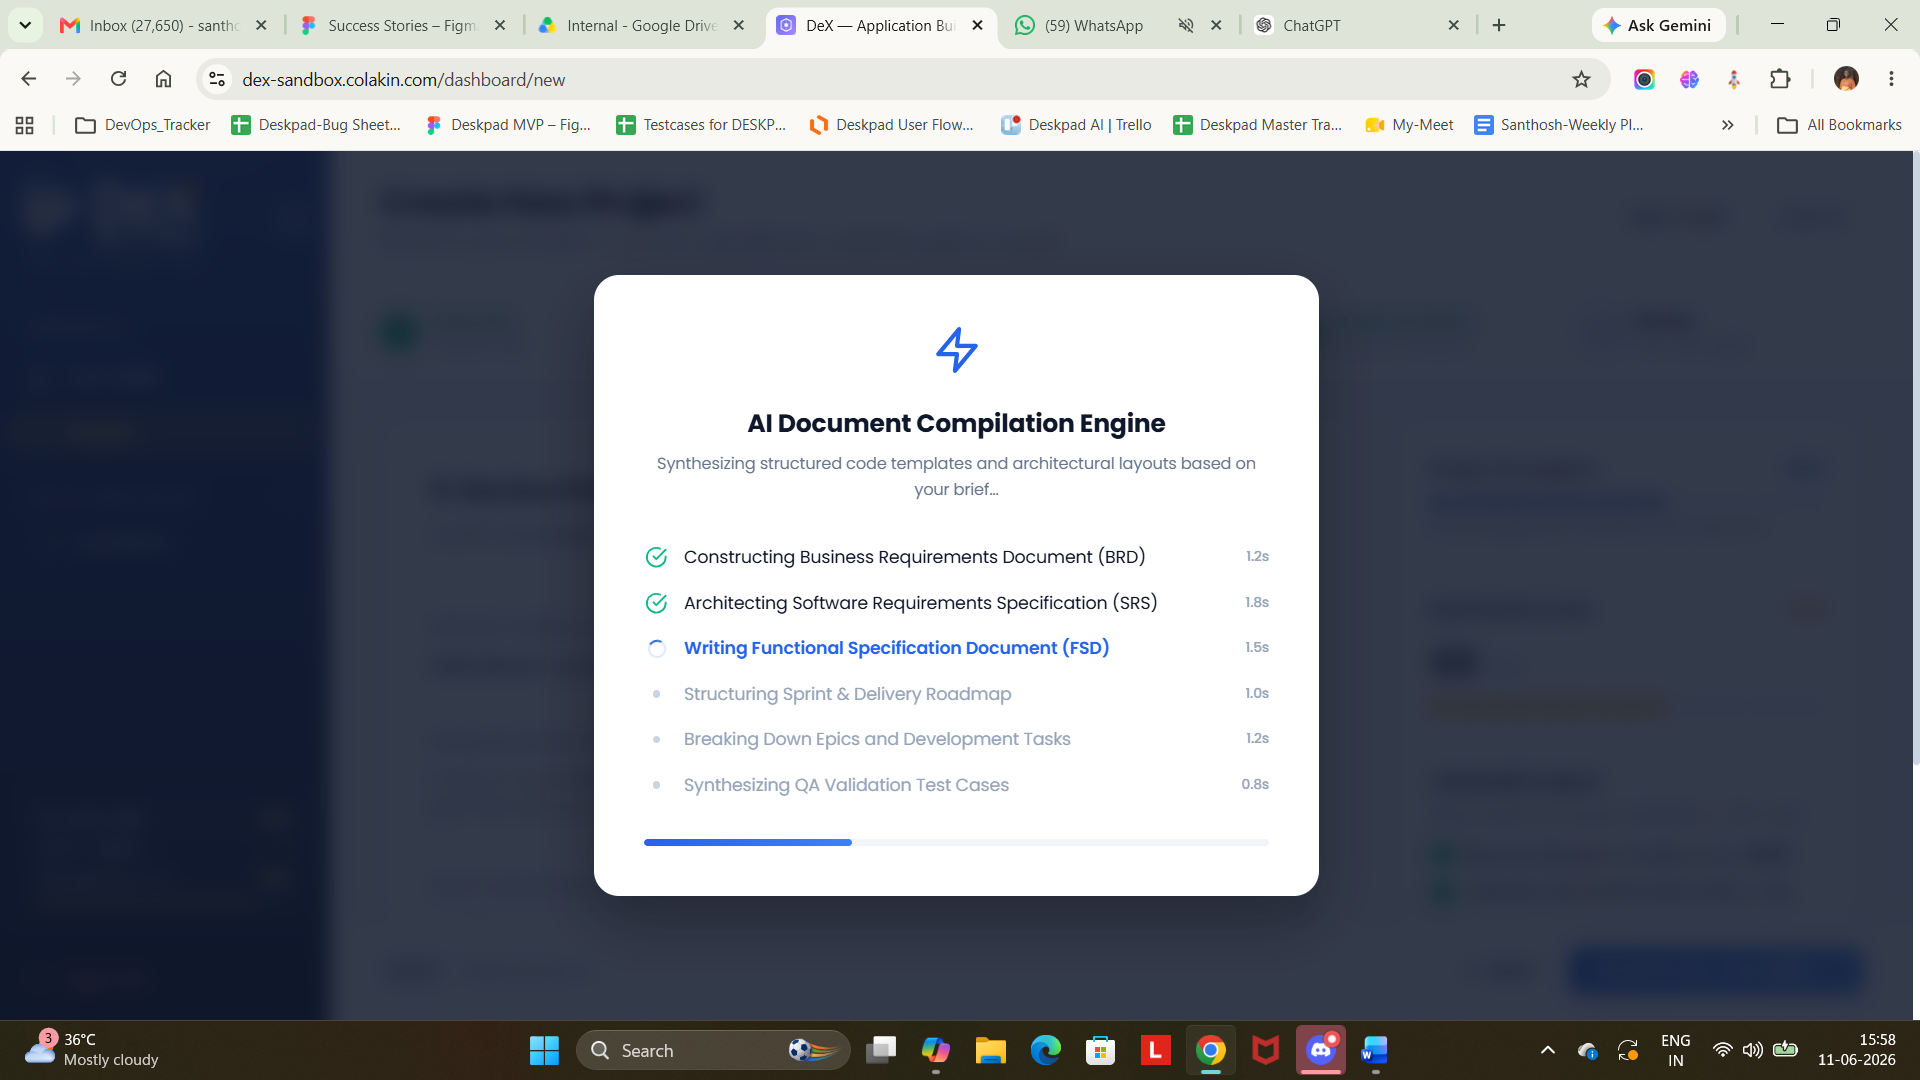
What Happens After You Click "Generate Documentation"?
Once you click Generate Documentation, DeX launches the AI Document Compilation Engine. The system processes all your inputs and begins synthesizing:
- ✅ Business Requirement Document (BRD)
- ✅ Software Requirement Document (SRD)
- ✅ Functional Specification Document (FSD)
You will see a "Synthesizing Project" status while the AI works. Depending on project complexity, this typically takes a few moments.
Once complete, you will be automatically moved to Phase 2 – Specification in the Active Projects workflow.