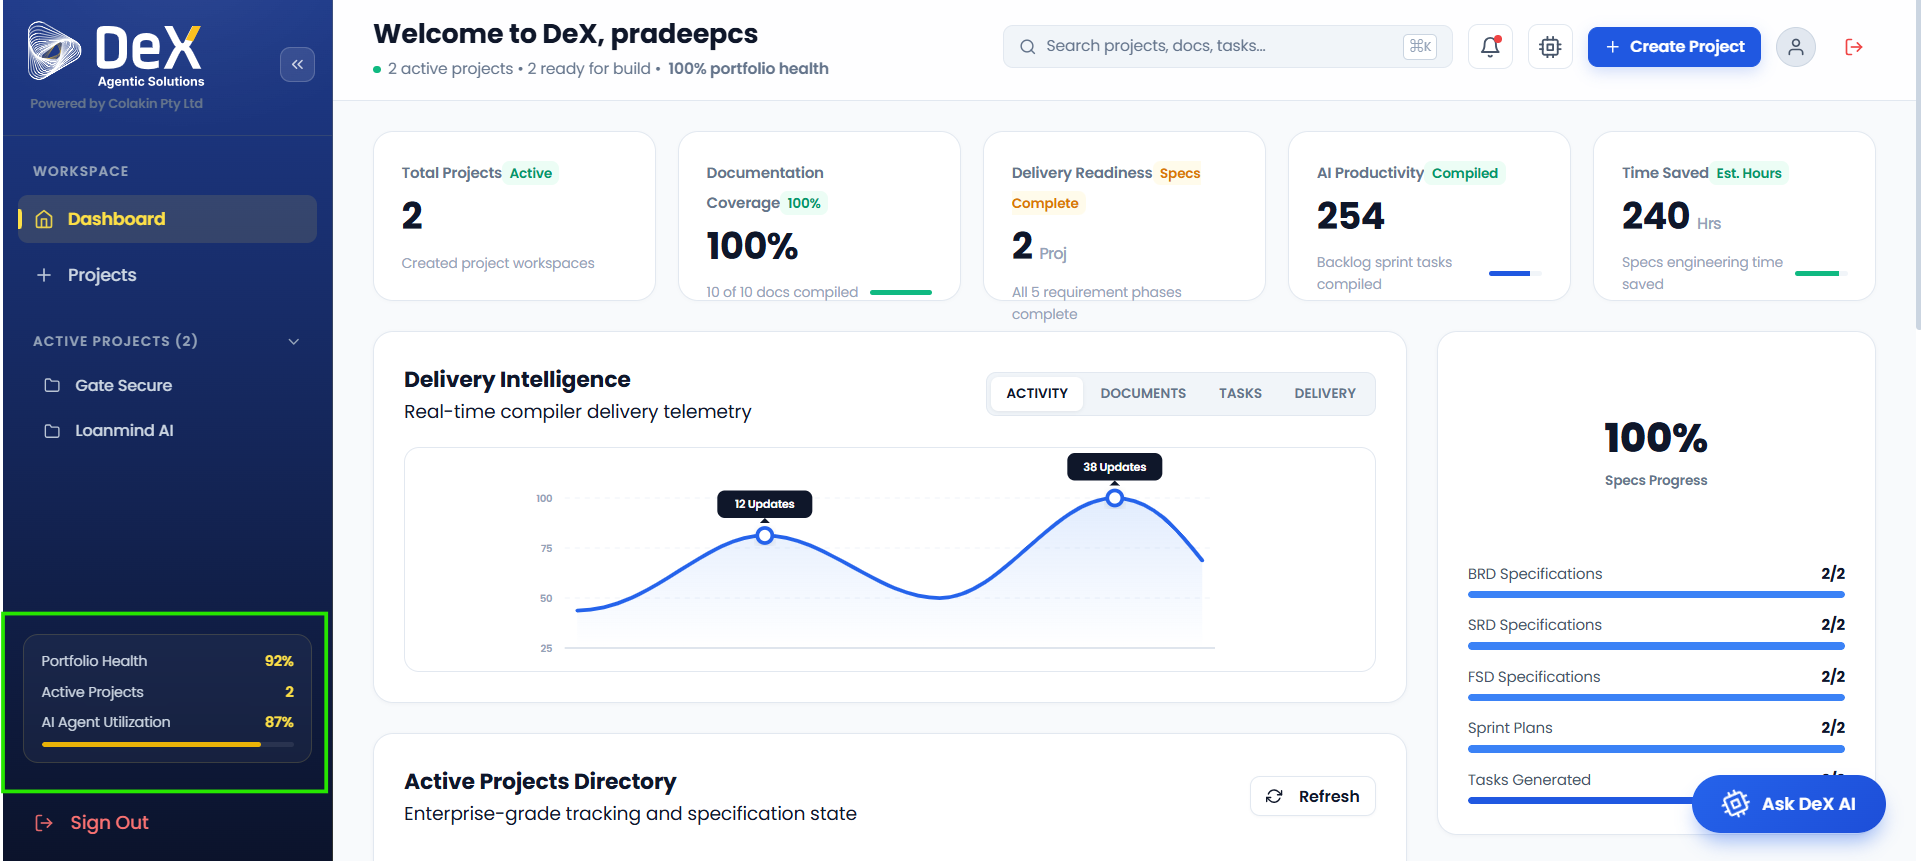
Active Projects
The Active Projects panel — accessible from the left menu — provides quick navigation and full visibility into all ongoing initiatives. It is designed to give teams and stakeholders immediate access to project details, health metrics, and every stage of the delivery workflow.
Once a project is created and documentation is generated, it enters a structured, sequential delivery pipeline composed of eight phases — from initial business request all the way through to completed task audit.
Delivery Pipeline Overview
Each project progresses through the following phases in order:
| Phase | Name | Purpose |
|---|---|---|
| 1 | Business Request | Capture problem statement and objectives |
| 2 | Specification | Generate BRD, SRD, and FSD documents |
| 3 | Plan & Task | Create sprint plans and development tasks |
| 4 | Build | Compile the application |
| 5 | Code – Git | Manage code in a Git repository |
| 6 | QA – Outcome | Run automated testing and validation |
| 7 | Deployment | Release the application to target environment |
| 8 | Completed Tasks | Review audit trail and build logs |
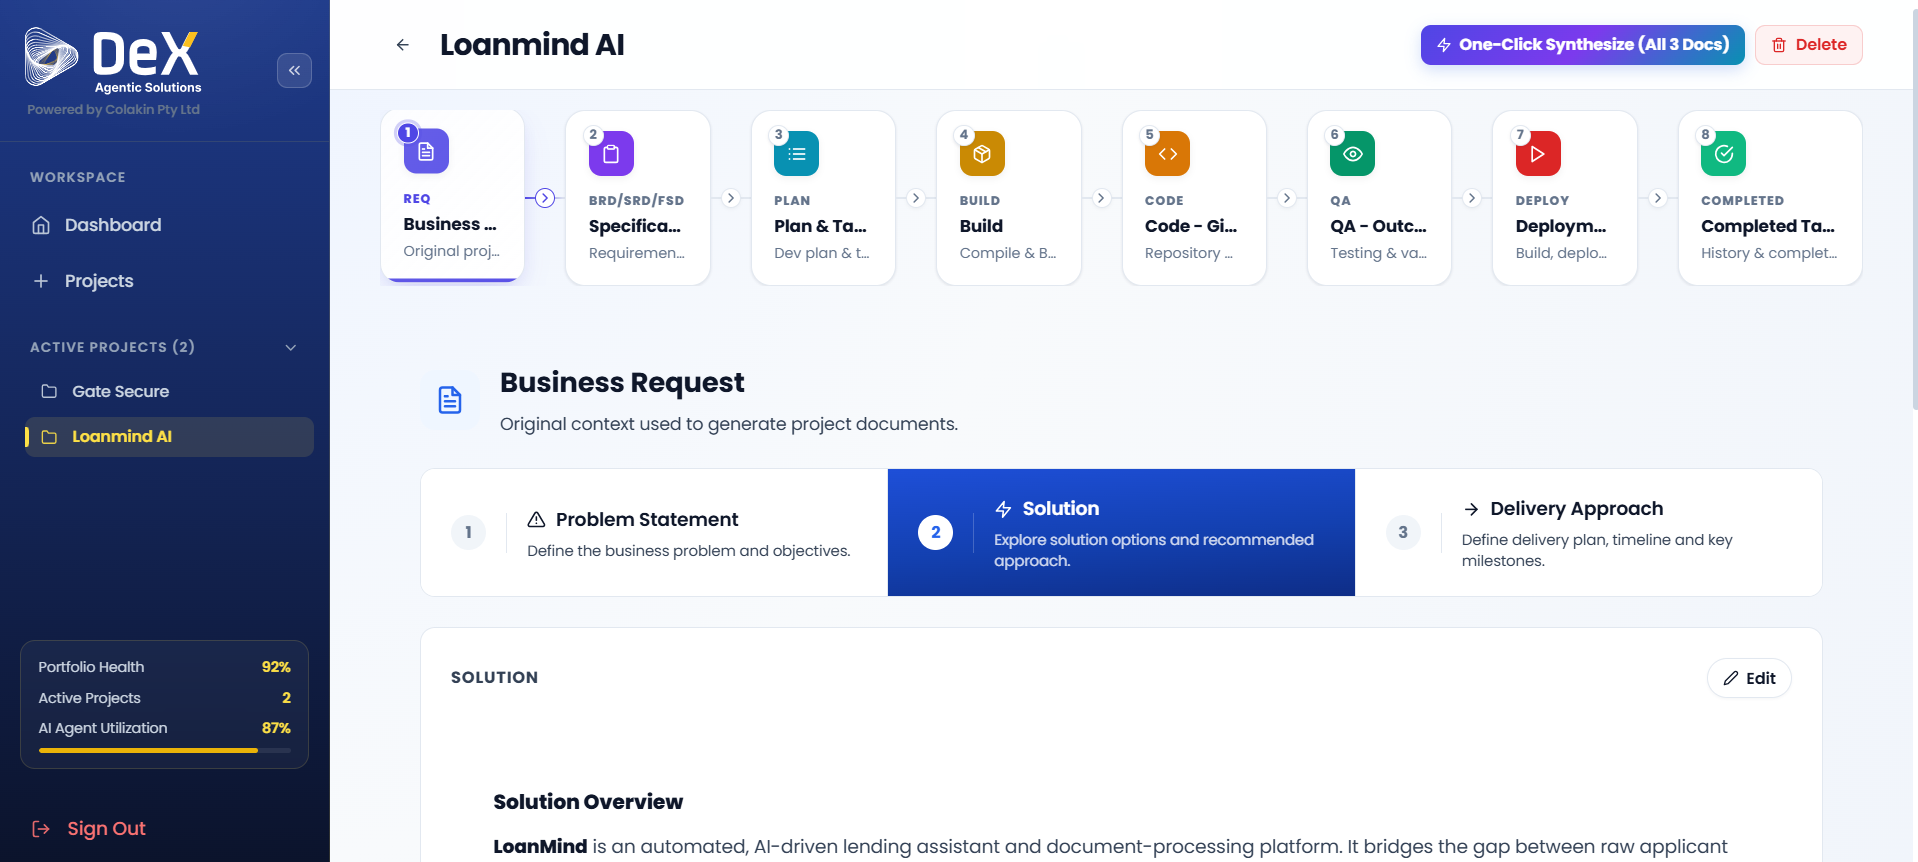
Phase 1 — Business Request
Purpose: Capture the initial problem statement, solution direction, and delivery approach that form the foundation for all downstream documentation.
The output of this phase is a clear, structured articulation of requirements that drives Specification in Phase 2.
Steps
- Navigate to the project and open Phase 1 – Business Request.
- Review or edit the Problem Statement to ensure accuracy.
- Add or refine the Solution description.
- Define or edit the Delivery Approach.
- Choose one of two paths to generate documents:
- Click "One Click Synthesize (All Docs)" to instantly generate BRD, FRD, and SRD together, or
- Navigate to Phase 2 – Specification and generate each document individually for more granular control.
⚡ One Click Synthesize is recommended for straightforward projects. For complex initiatives with nuanced requirements, generate documents individually so you can review and refine each one before proceeding.
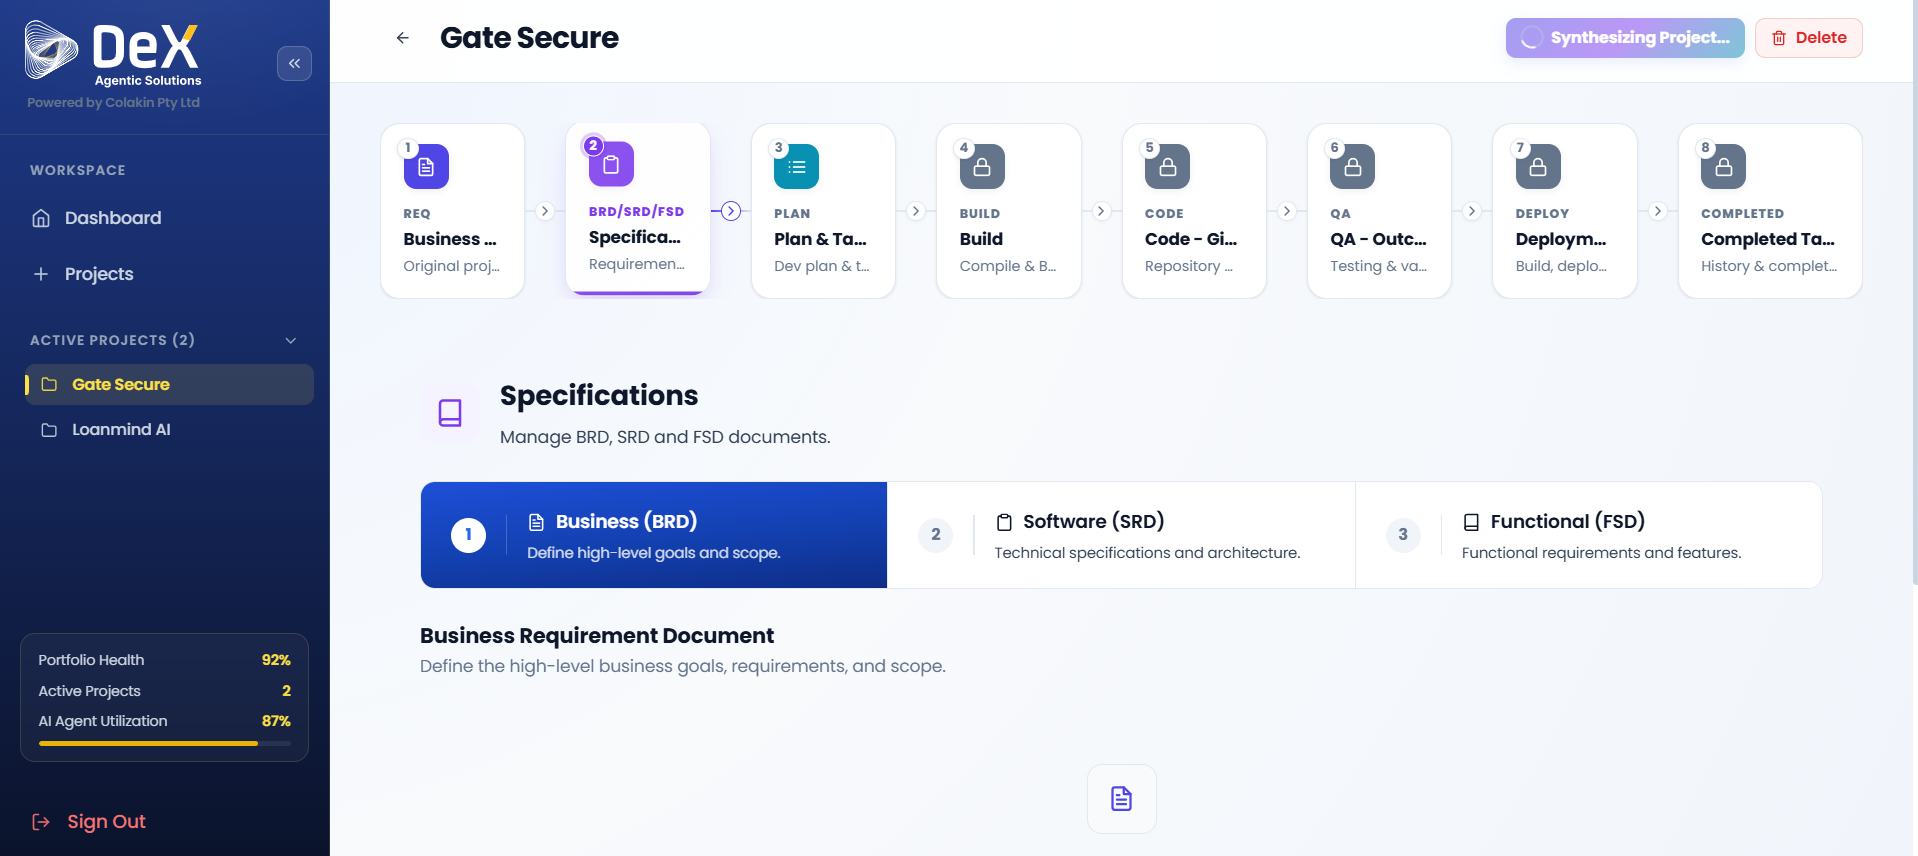
Phase 2 — Specification
Purpose: Synthesize structured requirement documents that translate business needs into technical and functional terms — ensuring alignment between stakeholders and delivery teams.
DeX generates three core documents in this phase:
| Document | Full Name | Audience |
|---|---|---|
| BRD | Business Requirement Document | Stakeholders, Product Owners |
| SRD | Software Requirement Document | Technical Leads, Architects |
| FSD | Functional Specification Document | Developers, QA Engineers |
Steps
- After completing Phase 1, you will be automatically moved to Phase 2 – Specification.
- Watch for the "Synthesizing Project" status — this confirms DeX is generating your documents.
- Once generation is complete, the BRD, FRD, and SRD will be available for review.
- For each document, you can:
- Preview — Read the generated content
- Edit — Refine any section directly in the editor
- Download — Export the document (PDF or DOCX)
- Regenerate — Re-run AI generation after refining your inputs
📝 If a document doesn't fully reflect your requirements, use the Edit function to adjust specific sections, or update your Phase 1 inputs and Regenerate for a fresh pass.
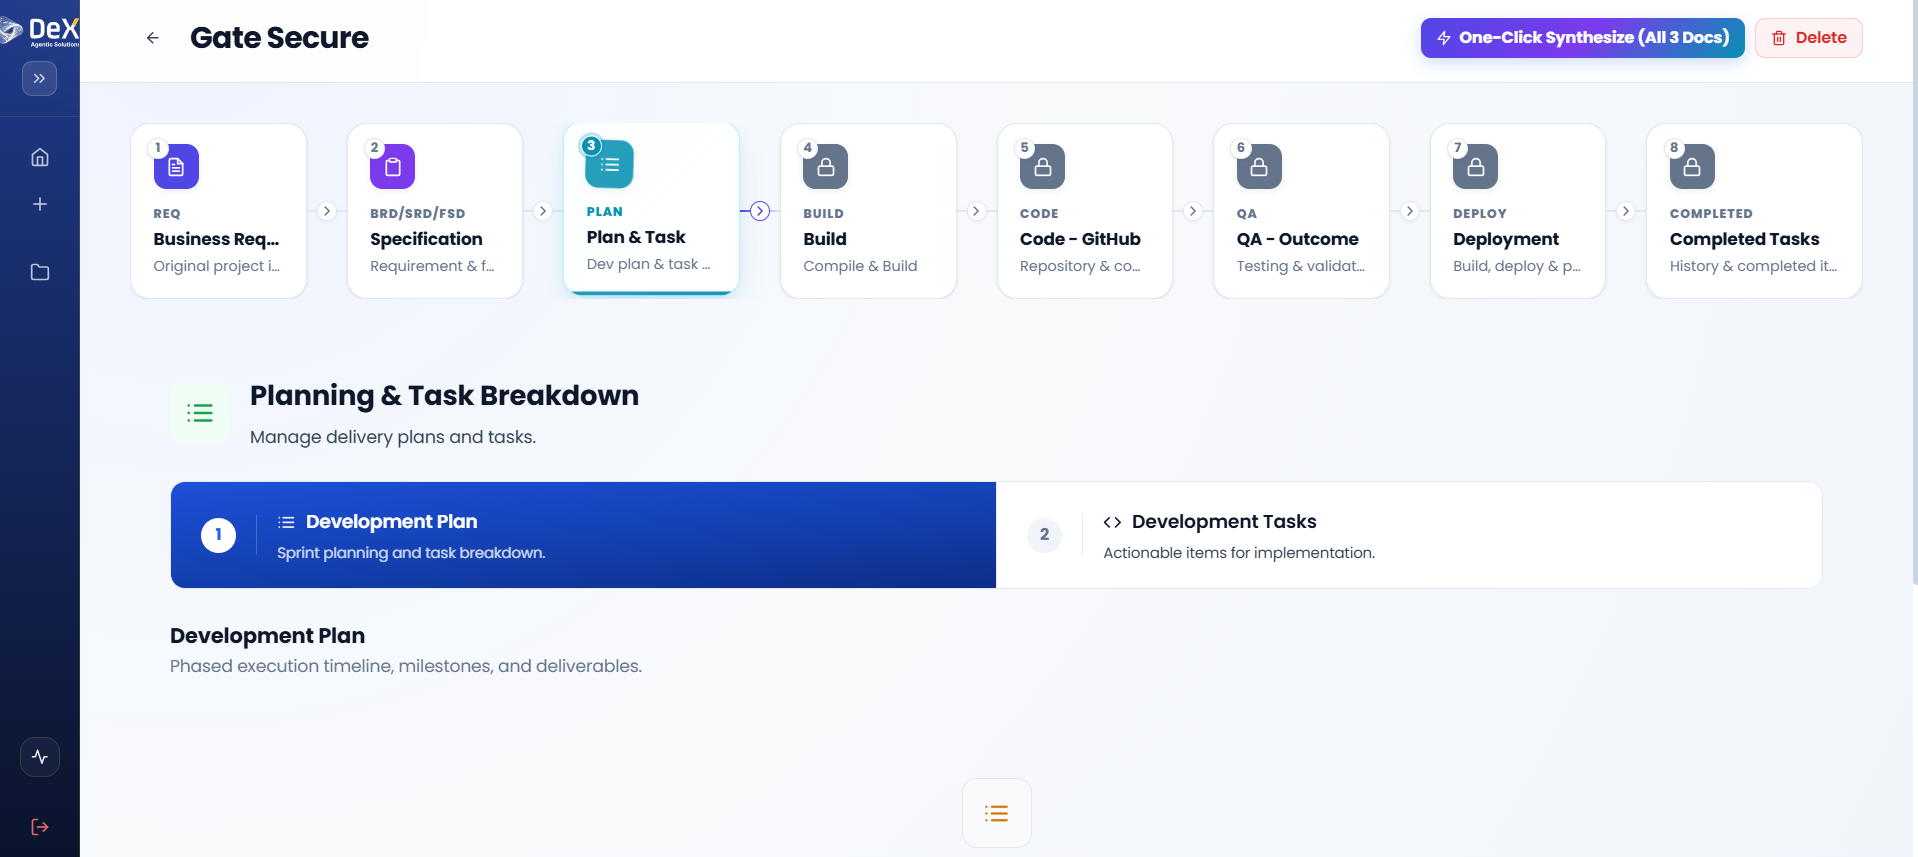
Phase 3 — Plan & Task
Purpose: Convert your approved specifications into an actionable development plan and task breakdown — forming the execution roadmap for the Build phase.
This phase has two components:
- Development Plan — Sprint timelines, milestones, and phased deliverables
- Development Tasks — Granular, actionable items for individual developers
Steps
Generating the Development Plan
- After completing Phase 2, proceed to Phase 3 – Plan & Task.
- Open the Development Plan tab.
- Click "Generate Plan" to create the sprint plan and phased execution timeline.
- Once generated, you can:
- Preview the plan
- Edit individual sprint items
- Download the plan document
- Regenerate with updated inputs
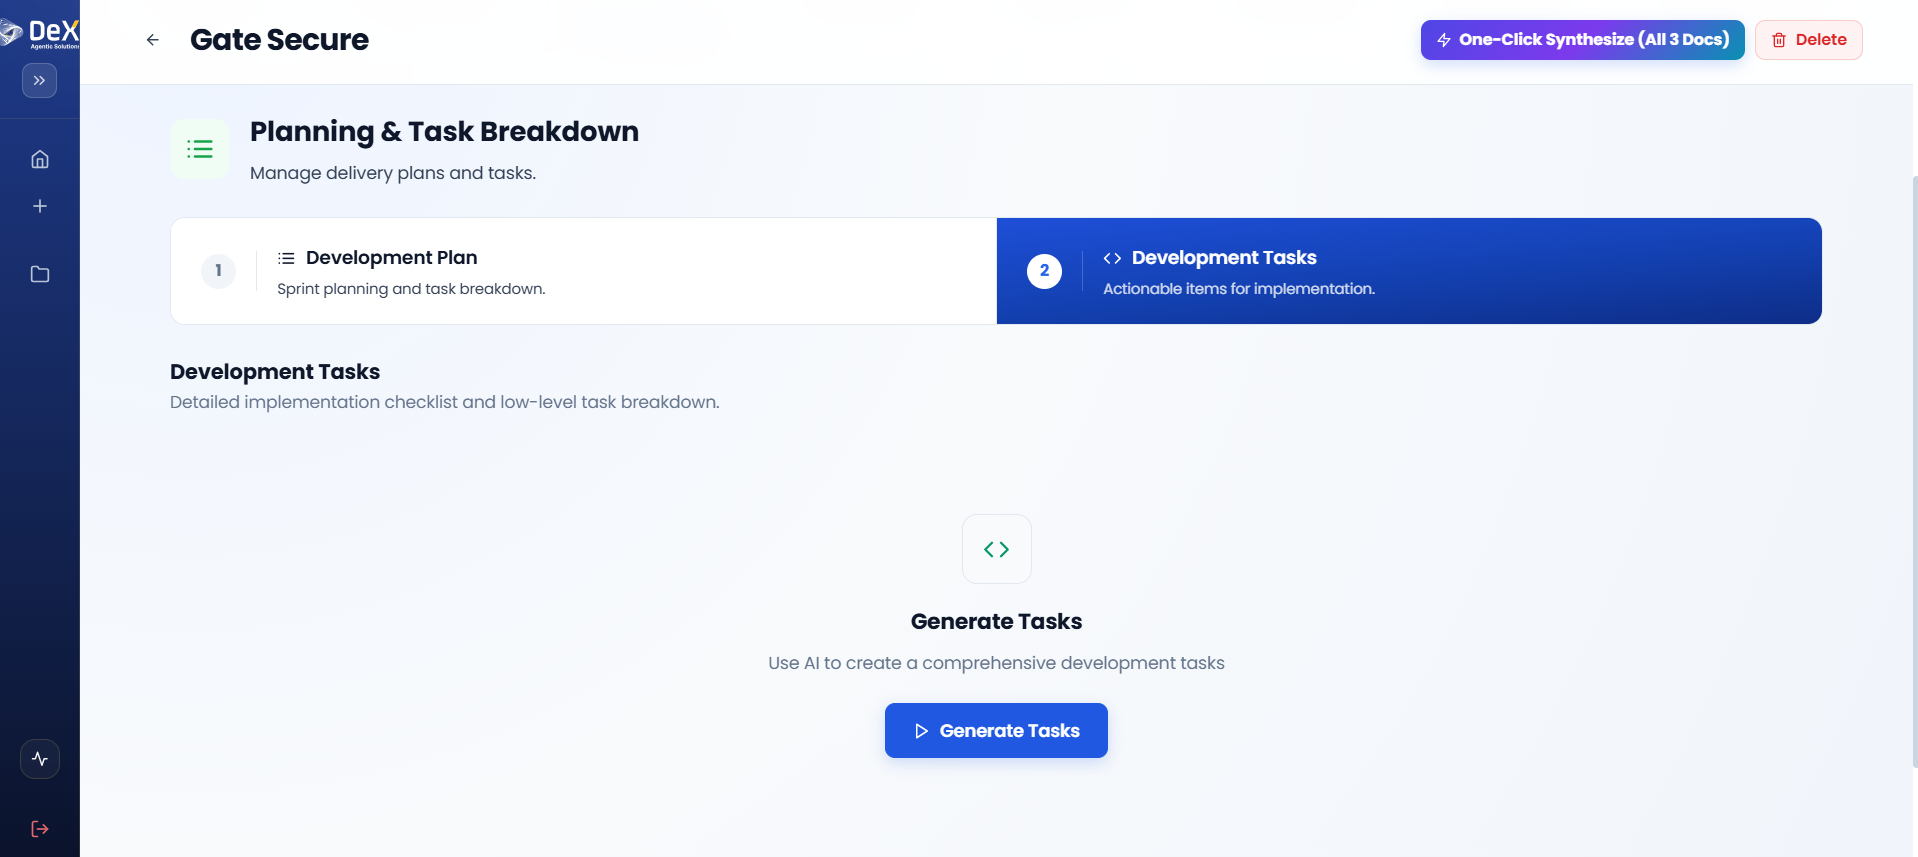
Generating Development Tasks
- After finalizing the plan, navigate to the Development Tasks tab.
- Click "Generate Tasks" — DeX will automatically create actionable tasks based on the approved plan.
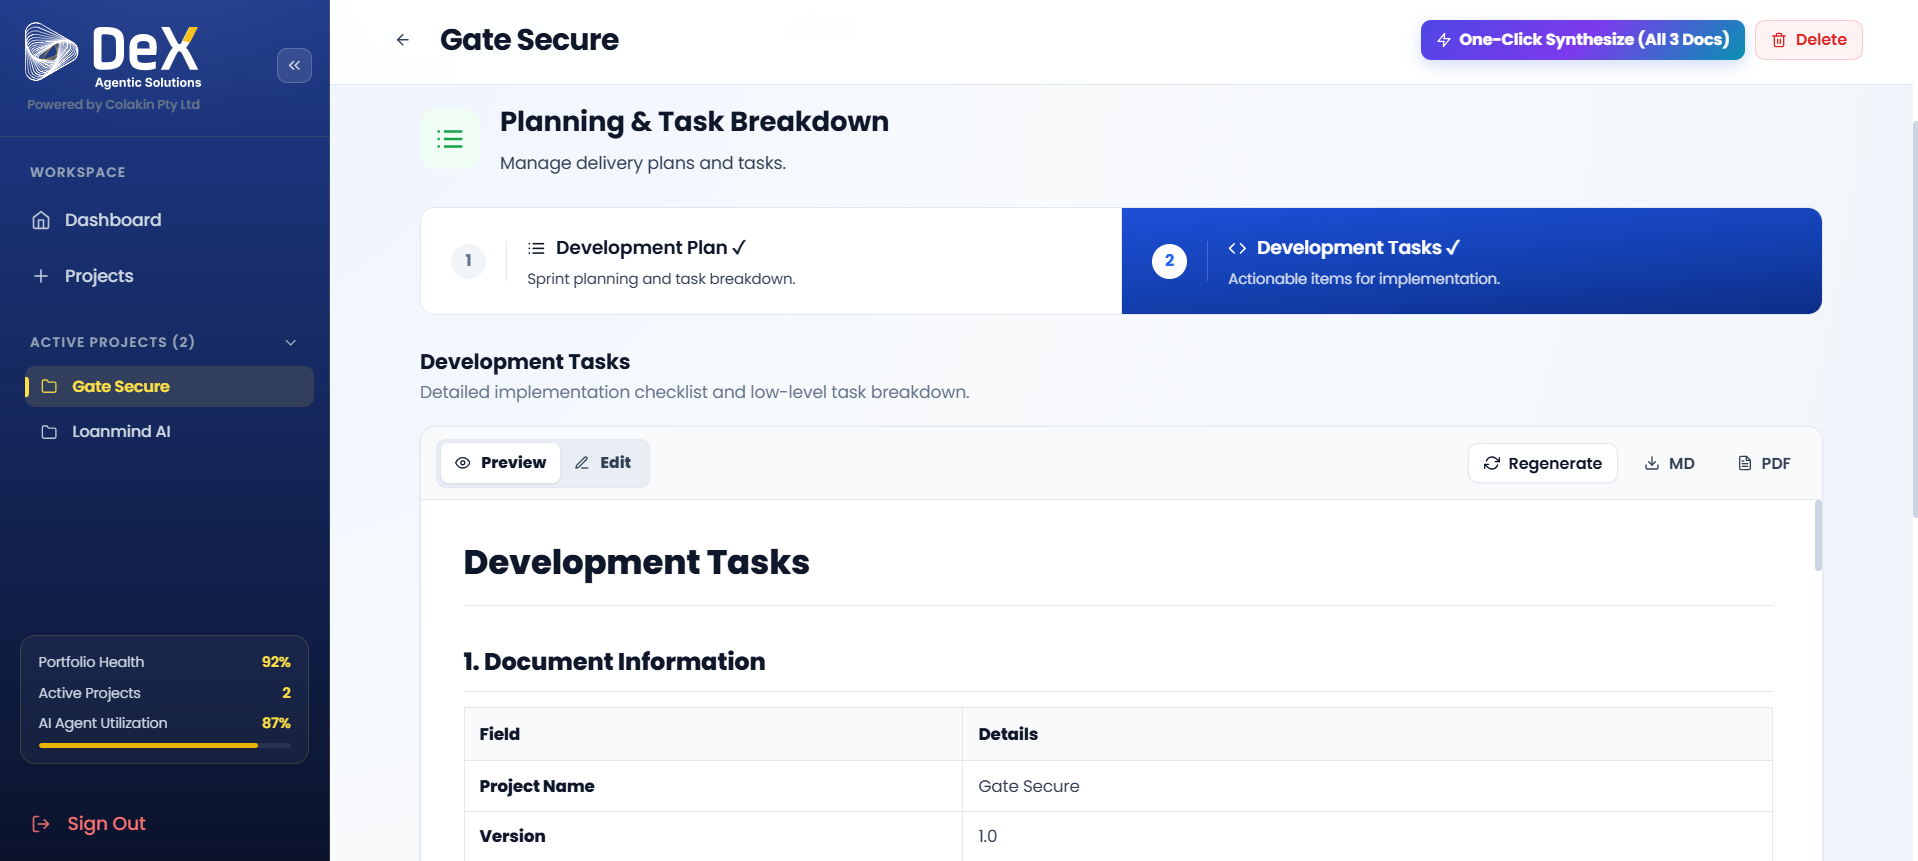
- Once generated, you can:
- Preview all tasks
- Edit individual tasks
- Download the task list
- Regenerate if the plan is updated
🗓️ Ensure the Development Plan is reviewed and approved by the team before generating tasks — tasks are derived directly from the plan structure.
Phase 4 — Build
Purpose: Compile and prepare the application for development execution based on the approved plan and tasks.
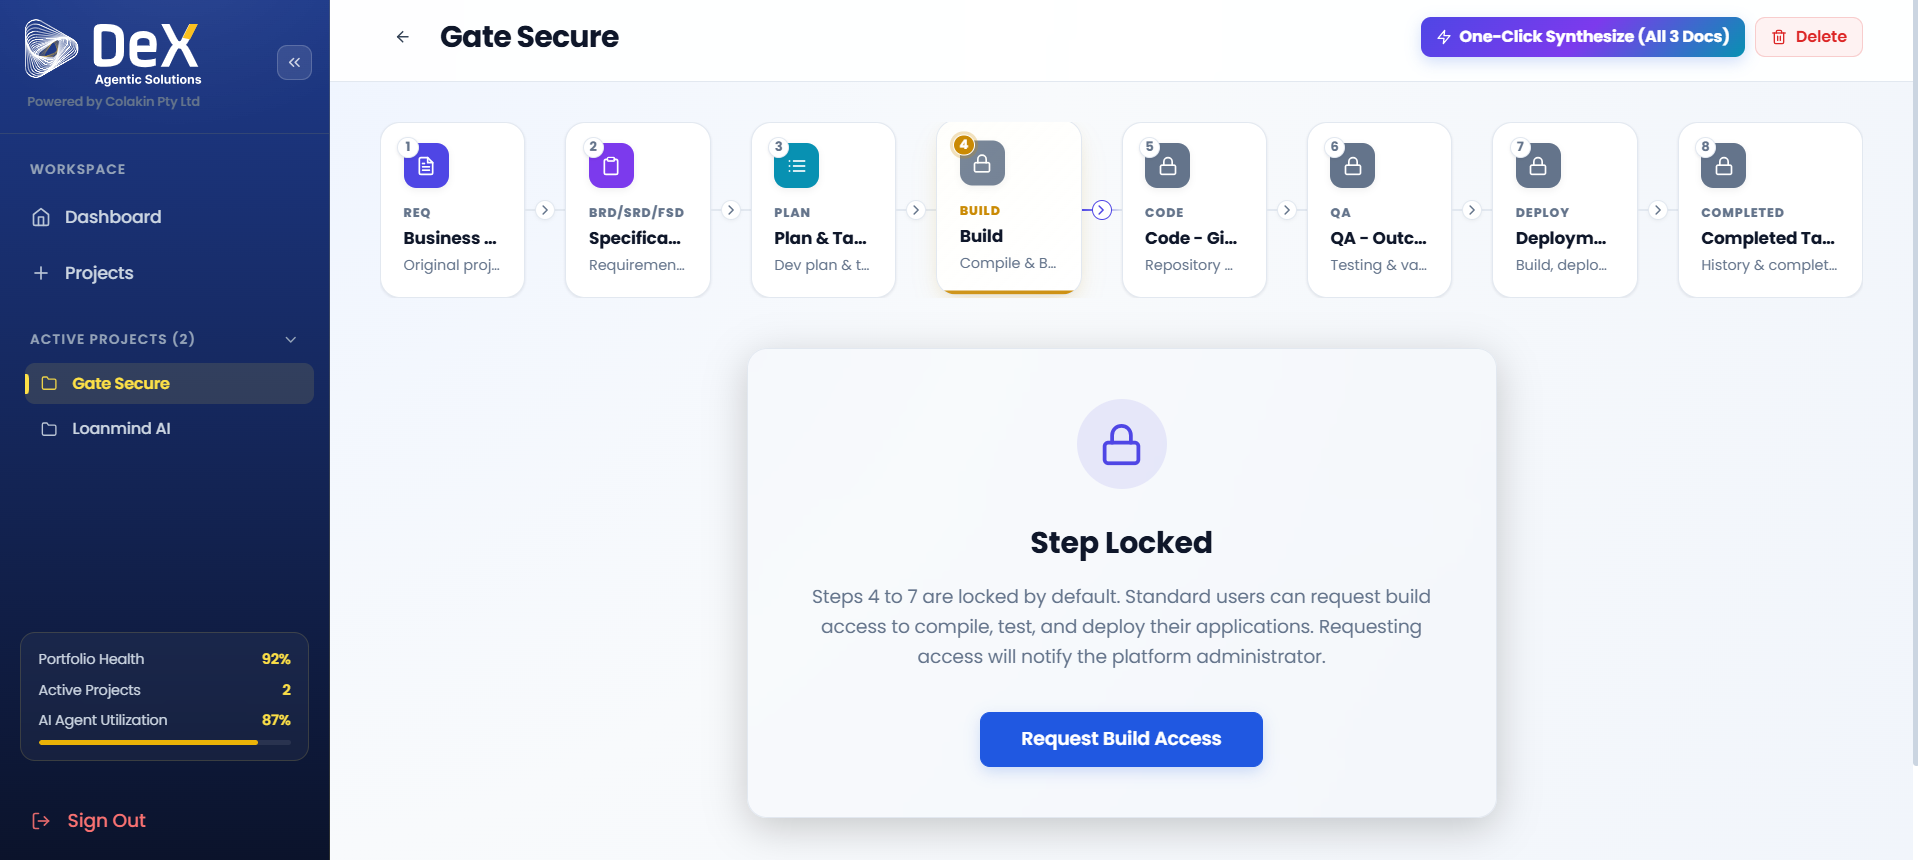
🔒 Access Control Notice: Phases 4 through 7 (Build, Code, QA, Deploy) are locked by default for standard users. This ensures governance, security, and proper authorization before compilation and deployment activities begin.
Requesting Build Access
- Click "Request Build Access" within Phase 4.
- This action sends a notification to the Platform Administrator.
- The administrator reviews and grants permissions for Build, Code, QA, and Deployment stages.
- Once approved, Phase 4 becomes fully accessible.
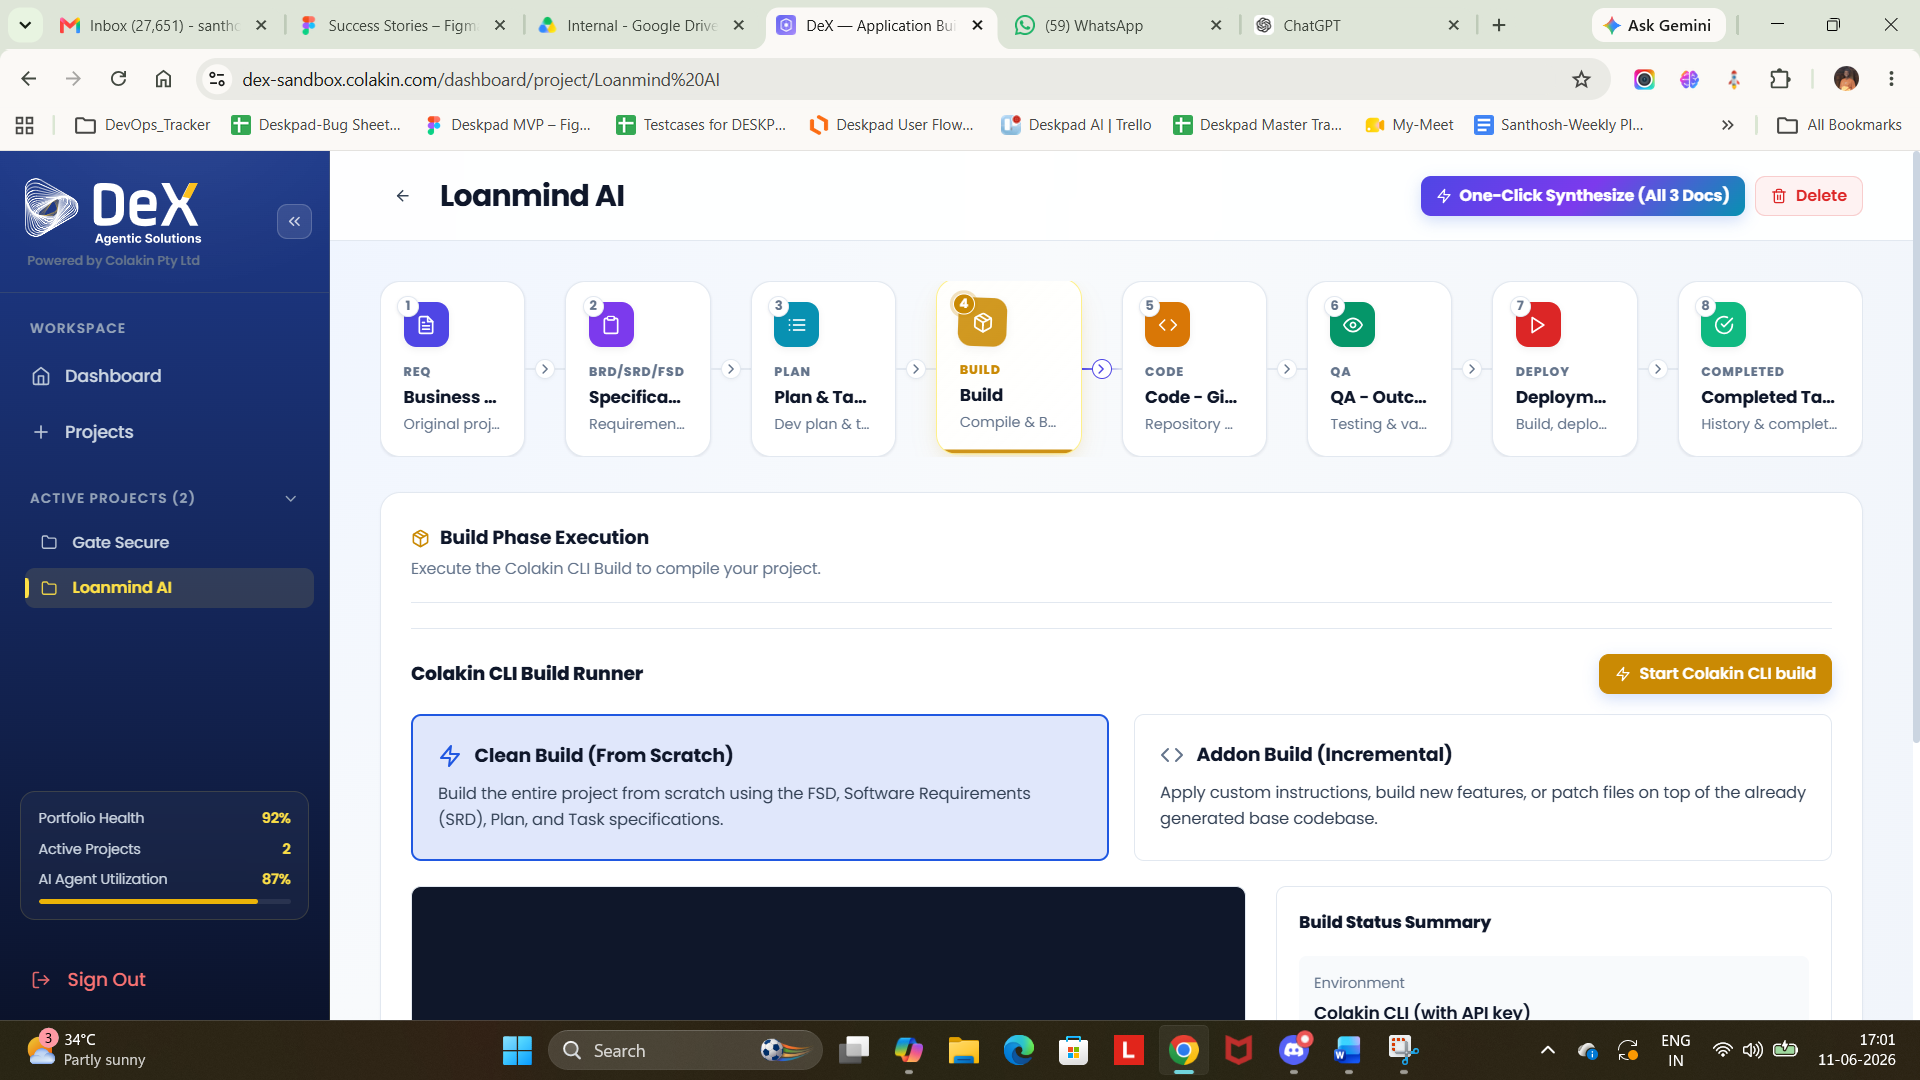
Build Execution
After access is granted, select your build strategy:
| Build Type | Description | When to Use |
|---|---|---|
| Clean Build (From Scratch) | Compiles the entire project using FSD, SRD, and development plan | New projects or full rebuilds |
| Addon Build (Incremental) | Applies custom instructions; builds new features or patches existing files | Feature additions or iterative updates |
Steps:
- Select your preferred build type.
- Click "Start Colakin CLI Build" to initiate the build process.
- Monitor build progress in the terminal output panel.
- On successful completion, Phase 5 – Code becomes unlocked.
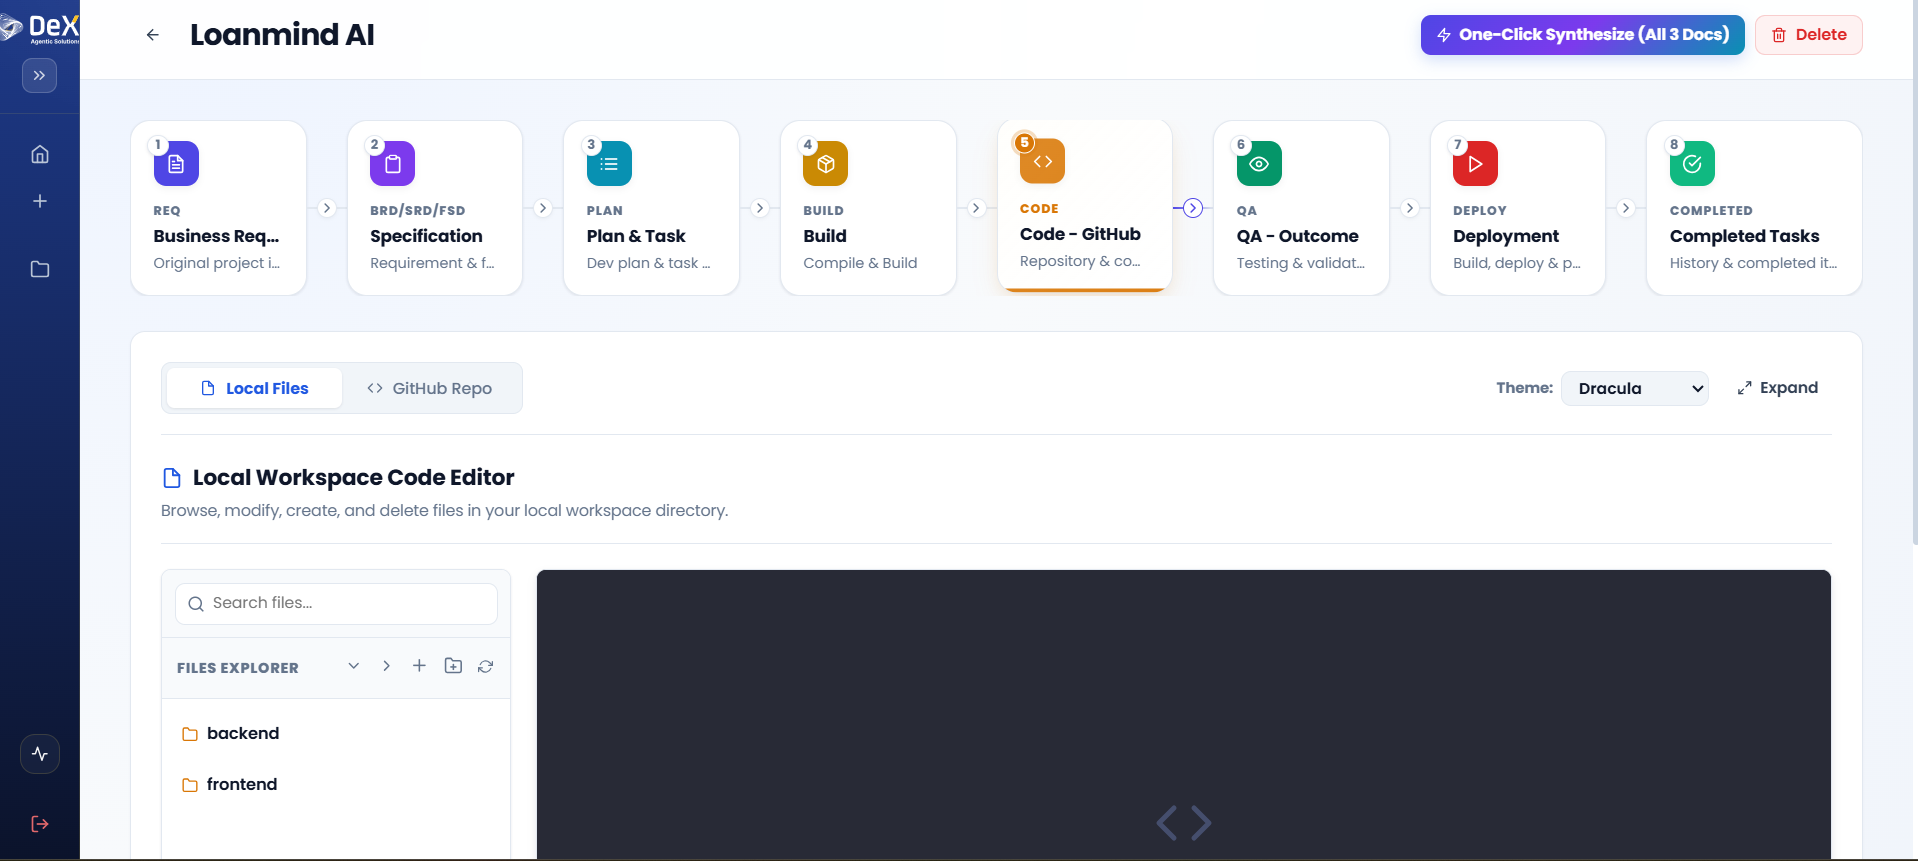
Phase 5 — Code – Git Repository
Purpose: Integrate the compiled application into a Git repository and provide a local workspace code editor for developers to review, refine, and manage the generated codebase.
Steps
- Access the Local Files tab to browse backend and frontend directory structures.
- Use the GitHub Repo tab to synchronize code with your connected repository.
- Use the built-in file search to locate specific files quickly.
- Open any file in the inline editor to view its contents.
- Perform file operations as needed:
- Modify existing files
- Create new files
- Delete files that are no longer needed
🔗 Ensure your GitHub repository is connected before attempting to sync. Repository settings can be configured in your account preferences.
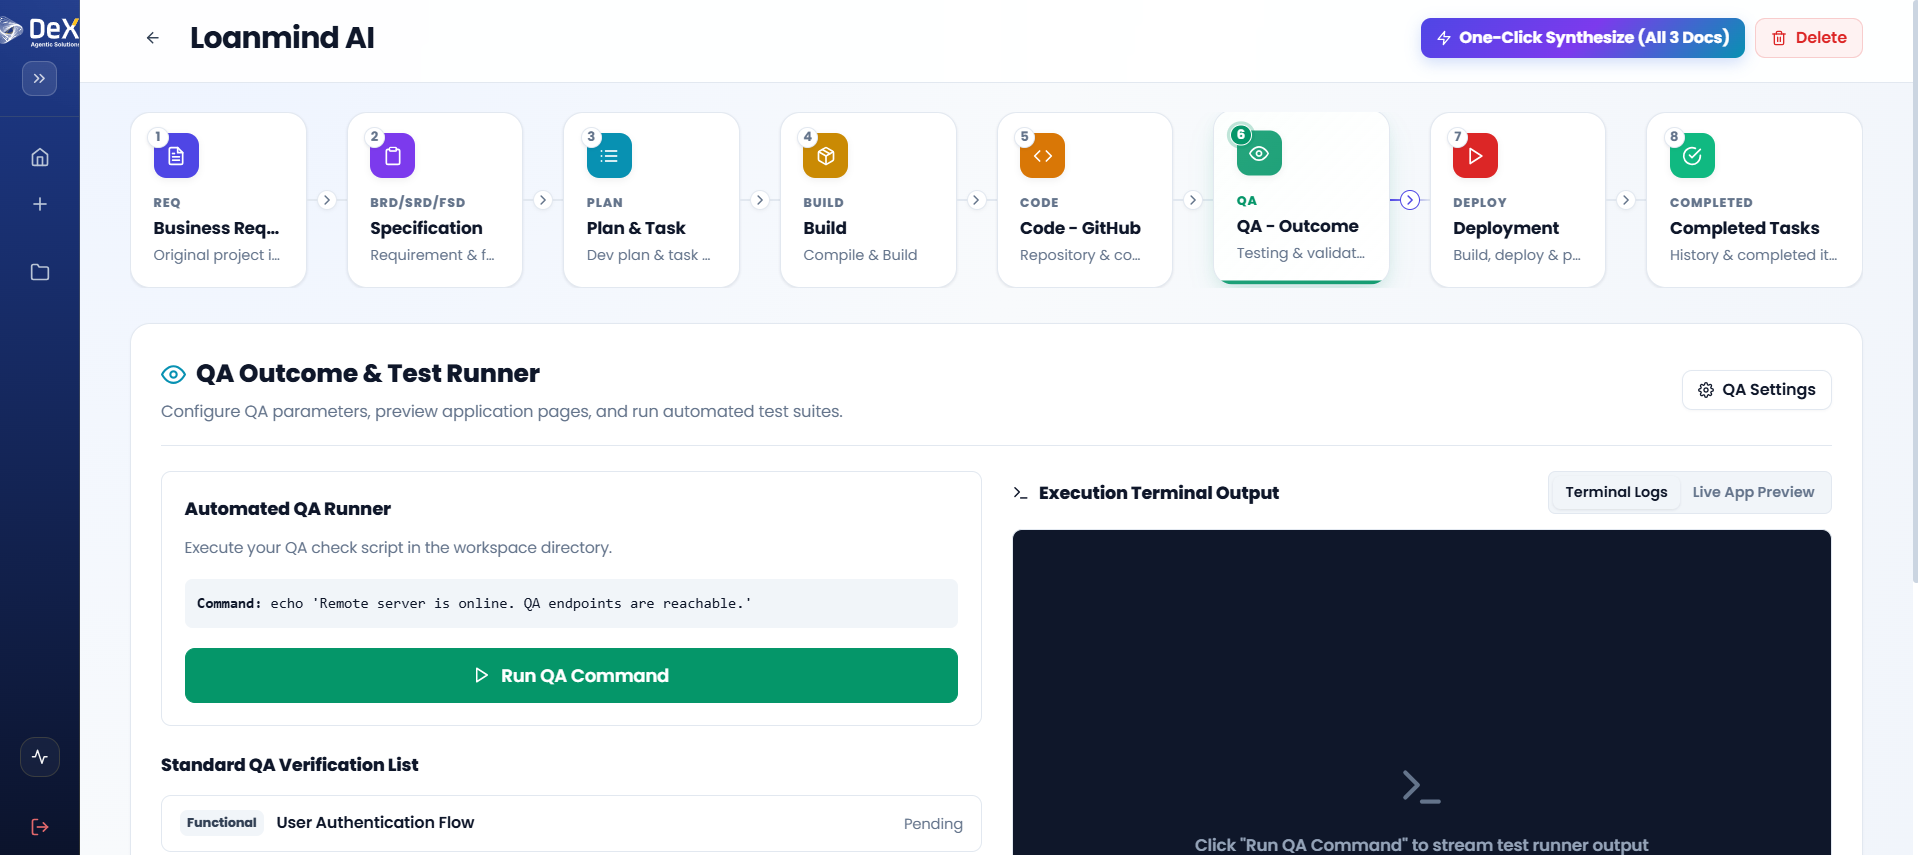
Phase 6 — QA – Outcome
Purpose: Validate the generated application through automated testing to ensure functionality, security, and system stability before deployment.
DeX provides an Automated QA Runner with configurable test suites covering multiple validation categories.
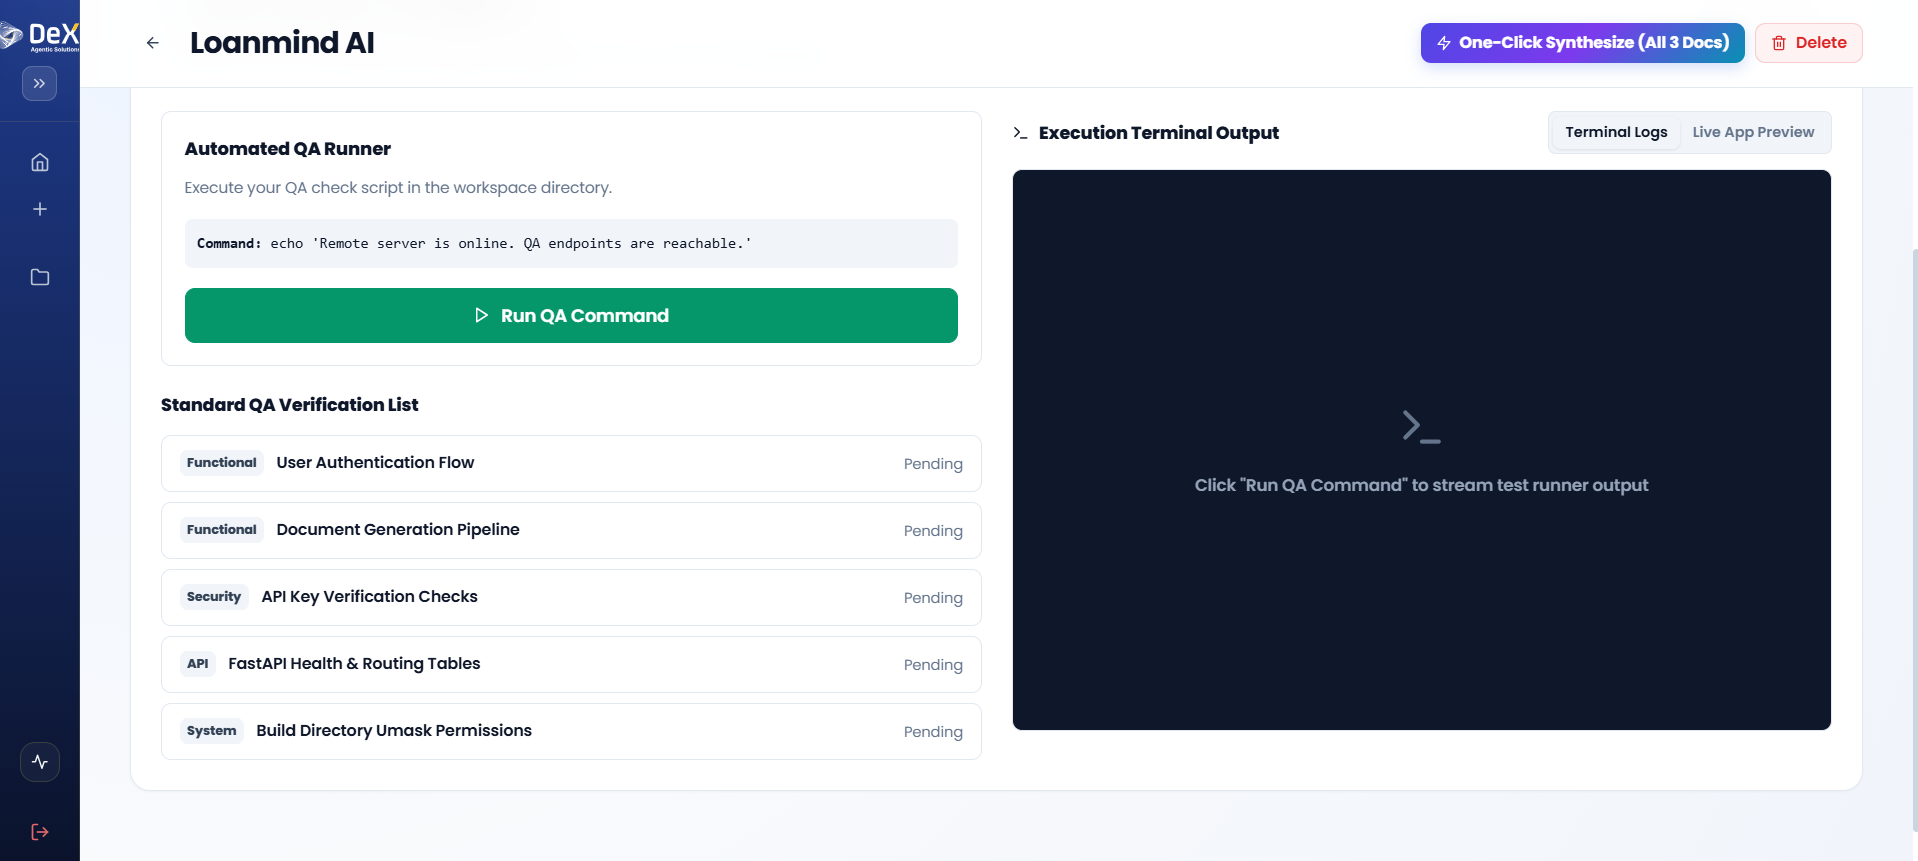
QA Verification Categories
| Category | Example Checks |
|---|---|
| Functional | User Authentication Flow, Document Generation Pipeline |
| Security | API Key Verification, Authorization checks |
| API | FastAPI Health & Routing Tables |
| System | Build Directory Permissions, File integrity |
Steps
- After completing Phase 5, navigate to Phase 6 – QA Outcome.
- Review the Standard QA Verification List — items are pre-populated based on your project stack.
- Click Run QA to execute the automated test suite.
- Observe results in the Execution Terminal Output panel in real time.
- Switch between:
- Terminal Logs — Detailed execution output
- Live App Preview — Visual validation of the running application
⚠️ If any checks fail, return to Phase 5 – Code to resolve the issues, then re-run the QA suite before proceeding to deployment.
Phase 7 — Deployment
Purpose: Release the validated application into the target environment using DeX's Continuous Deployment Portal with live preview capabilities.
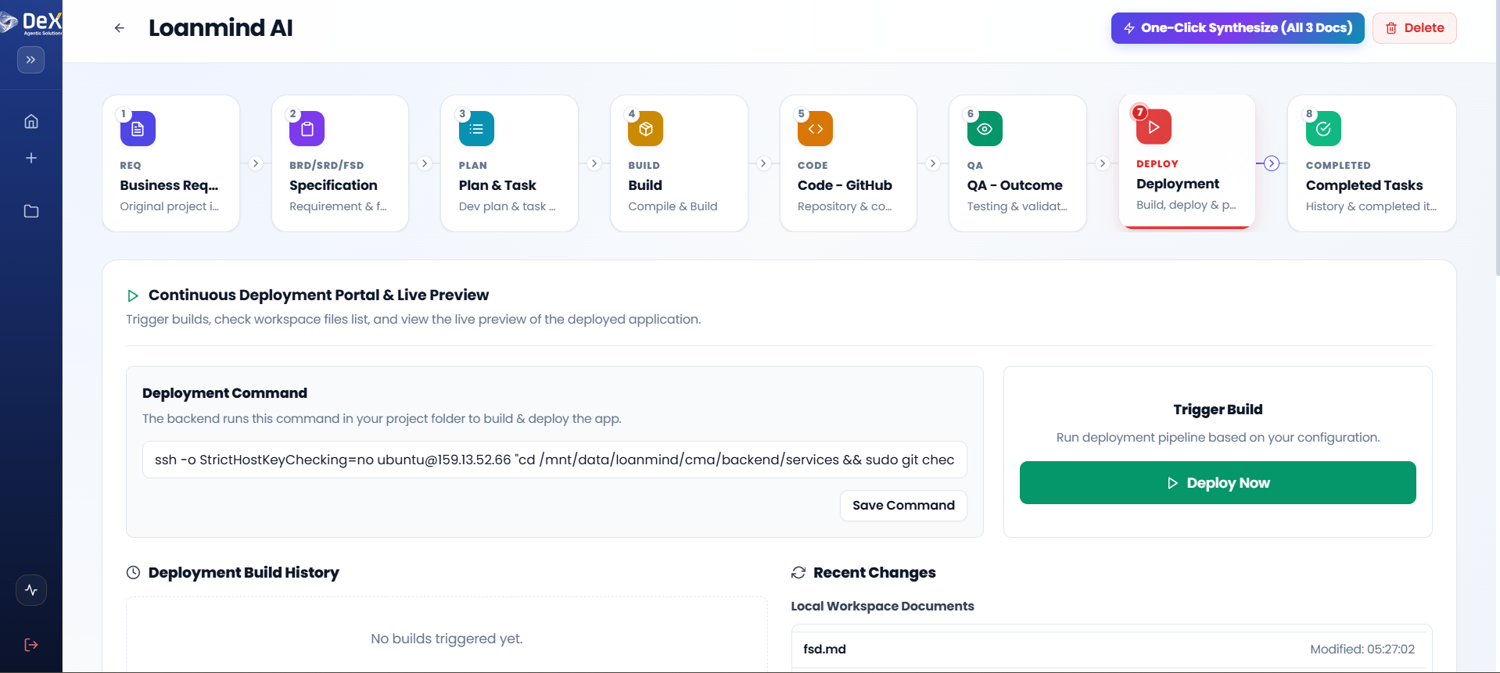
Steps
- After all QA checks pass, navigate to Phase 7 – Deployment.
- Click "Deploy Now" to trigger the deployment process.
- The system executes the deployment command and begins publishing the application.
- Scroll down to the Live App Preview section to monitor the deployment in real time.
- Validate the deployed application directly within the preview panel.
- Click "Open in New Tab" for a full-screen view — ideal for stakeholder review or extended testing.
Live App Preview Tab
| Action | Purpose |
|---|---|
| Inline Preview | Validate deployment within the DeX portal |
| Open in New Tab | Full-screen review for stakeholders or extended testing |

✅ A successful deployment confirms the application is live in the target environment. Share the live URL with stakeholders for acceptance testing.
Phase 8 — Completed Tasks
Purpose: Provide a consolidated, auditable record of all completed development activities, build logs, and delivery milestones. This phase serves as the official audit trail for the project.
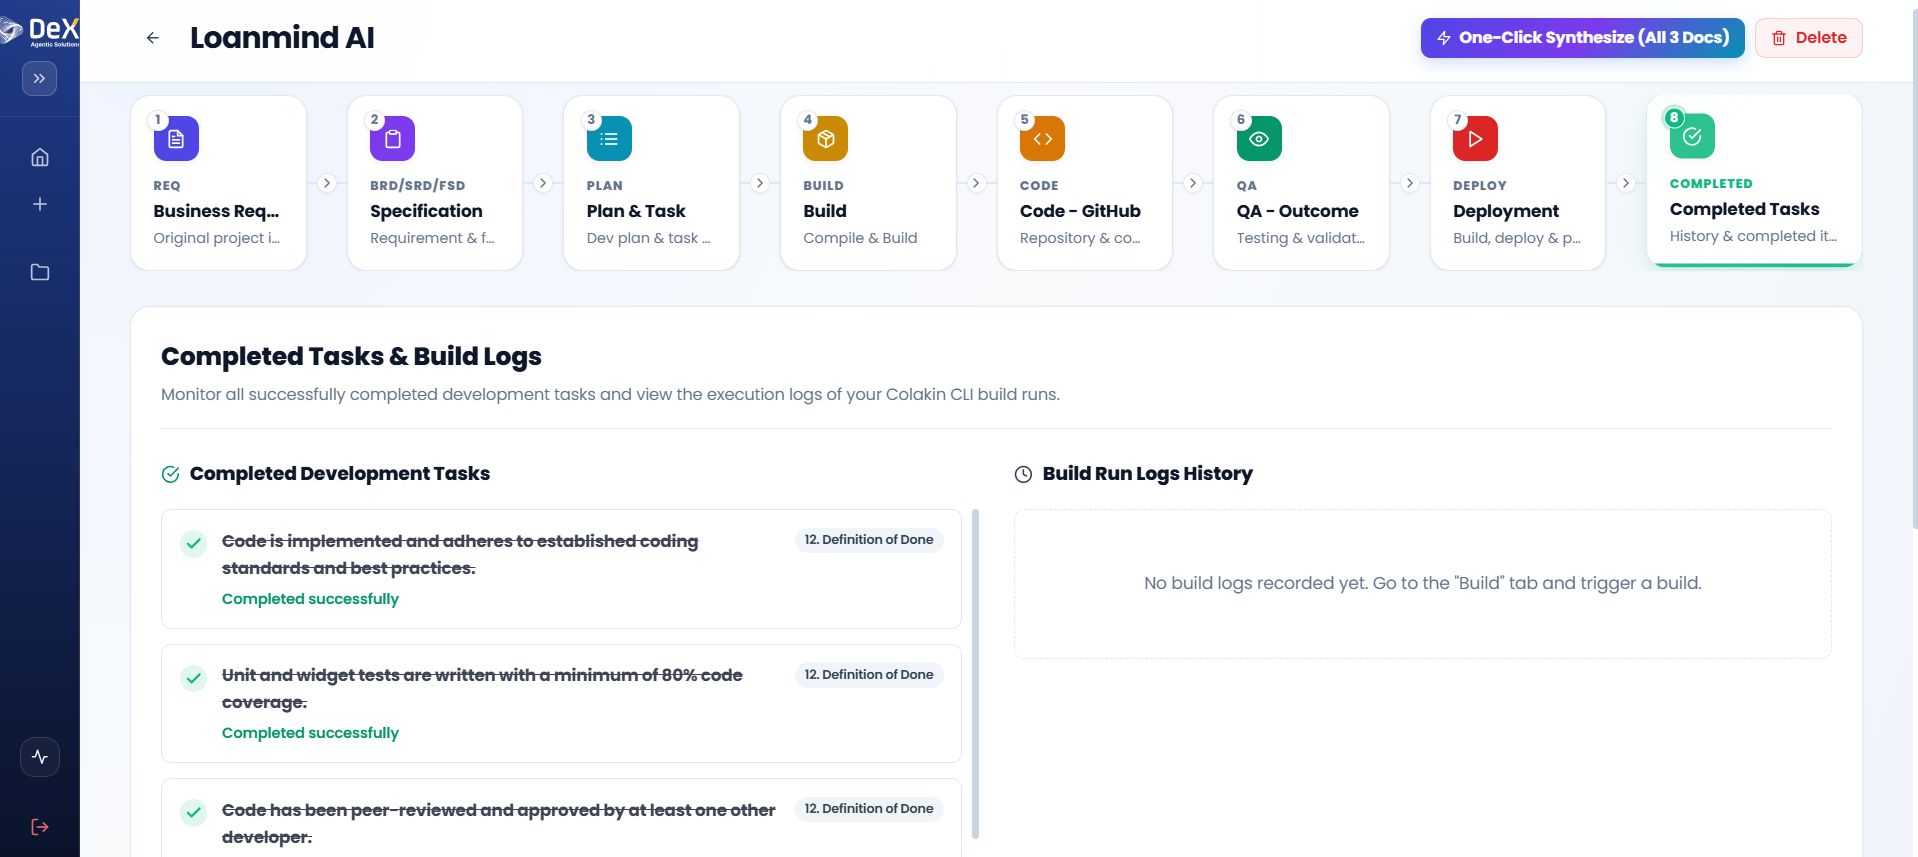
Steps
- After successful deployment, navigate to Phase 8 – Completed Tasks.
- Review the Completed Items List — each item is mapped to your Definition of Done criteria.
- Verify the completion status marked against each item for transparency.
- Access the Build Logs section to review detailed execution history.
- If no logs are recorded, return to the Build phase to trigger a build run first.
📋 Build logs provide full traceability for audits, compliance reviews, and post-mortems. Archive them as part of your project documentation package.